
1.13: Transformation
- Page ID
- 36755
\( \newcommand{\vecs}[1]{\overset { \scriptstyle \rightharpoonup} {\mathbf{#1}} } \)
\( \newcommand{\vecd}[1]{\overset{-\!-\!\rightharpoonup}{\vphantom{a}\smash {#1}}} \)
\( \newcommand{\dsum}{\displaystyle\sum\limits} \)
\( \newcommand{\dint}{\displaystyle\int\limits} \)
\( \newcommand{\dlim}{\displaystyle\lim\limits} \)
\( \newcommand{\id}{\mathrm{id}}\) \( \newcommand{\Span}{\mathrm{span}}\)
( \newcommand{\kernel}{\mathrm{null}\,}\) \( \newcommand{\range}{\mathrm{range}\,}\)
\( \newcommand{\RealPart}{\mathrm{Re}}\) \( \newcommand{\ImaginaryPart}{\mathrm{Im}}\)
\( \newcommand{\Argument}{\mathrm{Arg}}\) \( \newcommand{\norm}[1]{\| #1 \|}\)
\( \newcommand{\inner}[2]{\langle #1, #2 \rangle}\)
\( \newcommand{\Span}{\mathrm{span}}\)
\( \newcommand{\id}{\mathrm{id}}\)
\( \newcommand{\Span}{\mathrm{span}}\)
\( \newcommand{\kernel}{\mathrm{null}\,}\)
\( \newcommand{\range}{\mathrm{range}\,}\)
\( \newcommand{\RealPart}{\mathrm{Re}}\)
\( \newcommand{\ImaginaryPart}{\mathrm{Im}}\)
\( \newcommand{\Argument}{\mathrm{Arg}}\)
\( \newcommand{\norm}[1]{\| #1 \|}\)
\( \newcommand{\inner}[2]{\langle #1, #2 \rangle}\)
\( \newcommand{\Span}{\mathrm{span}}\) \( \newcommand{\AA}{\unicode[.8,0]{x212B}}\)
\( \newcommand{\vectorA}[1]{\vec{#1}} % arrow\)
\( \newcommand{\vectorAt}[1]{\vec{\text{#1}}} % arrow\)
\( \newcommand{\vectorB}[1]{\overset { \scriptstyle \rightharpoonup} {\mathbf{#1}} } \)
\( \newcommand{\vectorC}[1]{\textbf{#1}} \)
\( \newcommand{\vectorD}[1]{\overrightarrow{#1}} \)
\( \newcommand{\vectorDt}[1]{\overrightarrow{\text{#1}}} \)
\( \newcommand{\vectE}[1]{\overset{-\!-\!\rightharpoonup}{\vphantom{a}\smash{\mathbf {#1}}}} \)
\( \newcommand{\vecs}[1]{\overset { \scriptstyle \rightharpoonup} {\mathbf{#1}} } \)
\(\newcommand{\longvect}{\overrightarrow}\)
\( \newcommand{\vecd}[1]{\overset{-\!-\!\rightharpoonup}{\vphantom{a}\smash {#1}}} \)
\(\newcommand{\avec}{\mathbf a}\) \(\newcommand{\bvec}{\mathbf b}\) \(\newcommand{\cvec}{\mathbf c}\) \(\newcommand{\dvec}{\mathbf d}\) \(\newcommand{\dtil}{\widetilde{\mathbf d}}\) \(\newcommand{\evec}{\mathbf e}\) \(\newcommand{\fvec}{\mathbf f}\) \(\newcommand{\nvec}{\mathbf n}\) \(\newcommand{\pvec}{\mathbf p}\) \(\newcommand{\qvec}{\mathbf q}\) \(\newcommand{\svec}{\mathbf s}\) \(\newcommand{\tvec}{\mathbf t}\) \(\newcommand{\uvec}{\mathbf u}\) \(\newcommand{\vvec}{\mathbf v}\) \(\newcommand{\wvec}{\mathbf w}\) \(\newcommand{\xvec}{\mathbf x}\) \(\newcommand{\yvec}{\mathbf y}\) \(\newcommand{\zvec}{\mathbf z}\) \(\newcommand{\rvec}{\mathbf r}\) \(\newcommand{\mvec}{\mathbf m}\) \(\newcommand{\zerovec}{\mathbf 0}\) \(\newcommand{\onevec}{\mathbf 1}\) \(\newcommand{\real}{\mathbb R}\) \(\newcommand{\twovec}[2]{\left[\begin{array}{r}#1 \\ #2 \end{array}\right]}\) \(\newcommand{\ctwovec}[2]{\left[\begin{array}{c}#1 \\ #2 \end{array}\right]}\) \(\newcommand{\threevec}[3]{\left[\begin{array}{r}#1 \\ #2 \\ #3 \end{array}\right]}\) \(\newcommand{\cthreevec}[3]{\left[\begin{array}{c}#1 \\ #2 \\ #3 \end{array}\right]}\) \(\newcommand{\fourvec}[4]{\left[\begin{array}{r}#1 \\ #2 \\ #3 \\ #4 \end{array}\right]}\) \(\newcommand{\cfourvec}[4]{\left[\begin{array}{c}#1 \\ #2 \\ #3 \\ #4 \end{array}\right]}\) \(\newcommand{\fivevec}[5]{\left[\begin{array}{r}#1 \\ #2 \\ #3 \\ #4 \\ #5 \\ \end{array}\right]}\) \(\newcommand{\cfivevec}[5]{\left[\begin{array}{c}#1 \\ #2 \\ #3 \\ #4 \\ #5 \\ \end{array}\right]}\) \(\newcommand{\mattwo}[4]{\left[\begin{array}{rr}#1 \amp #2 \\ #3 \amp #4 \\ \end{array}\right]}\) \(\newcommand{\laspan}[1]{\text{Span}\{#1\}}\) \(\newcommand{\bcal}{\cal B}\) \(\newcommand{\ccal}{\cal C}\) \(\newcommand{\scal}{\cal S}\) \(\newcommand{\wcal}{\cal W}\) \(\newcommand{\ecal}{\cal E}\) \(\newcommand{\coords}[2]{\left\{#1\right\}_{#2}}\) \(\newcommand{\gray}[1]{\color{gray}{#1}}\) \(\newcommand{\lgray}[1]{\color{lightgray}{#1}}\) \(\newcommand{\rank}{\operatorname{rank}}\) \(\newcommand{\row}{\text{Row}}\) \(\newcommand{\col}{\text{Col}}\) \(\renewcommand{\row}{\text{Row}}\) \(\newcommand{\nul}{\text{Nul}}\) \(\newcommand{\var}{\text{Var}}\) \(\newcommand{\corr}{\text{corr}}\) \(\newcommand{\len}[1]{\left|#1\right|}\) \(\newcommand{\bbar}{\overline{\bvec}}\) \(\newcommand{\bhat}{\widehat{\bvec}}\) \(\newcommand{\bperp}{\bvec^\perp}\) \(\newcommand{\xhat}{\widehat{\xvec}}\) \(\newcommand{\vhat}{\widehat{\vvec}}\) \(\newcommand{\uhat}{\widehat{\uvec}}\) \(\newcommand{\what}{\widehat{\wvec}}\) \(\newcommand{\Sighat}{\widehat{\Sigma}}\) \(\newcommand{\lt}{<}\) \(\newcommand{\gt}{>}\) \(\newcommand{\amp}{&}\) \(\definecolor{fillinmathshade}{gray}{0.9}\)Learning Objectives
Goals:
- Explain how the information encoded in a gene is expressed as a trait
- Describe the role of transformation in cloning genes
- Explain the purpose of each control in the transformation experiment
Student Learning Outcomes:
Upon completion of this lab, students will be able to:
- Carryout a transformation
- Predict the growth results for the negative control and plasmid containing reaction on both antibiotic-containing and nutrient agar only media
- Explain your reasoning, if predicted growth results don’t match actual growth results
Introduction
Genetic engineering or DNA technology has been useful for producing large quantities of a specific protein to treat human diseases. For example, patients with diabetes, hemophilia, or anemia require treatments with insulin, clotting factor, and growth factor proteins. Targeted genes (DNA) can be cut with restriction enzymes and joined with other DNA with the enzyme ligase. A cloning vector is used to carry the recombinant DNA into living cells, so that the cells can synthesize the encoded proteins. The best cloning vectors are small in size, able to replicate its DNA, contain restriction enzyme recognition sites, and have a marker gene (usually antibiotic resistance gene). In this lab, we will use a recombinant plasmid as the cloning vector. This recombinant plasmid contains (1) a promoter that enables transcription of desired gene, (2) a sequence for the initiation of DNA replication (ori site), and (3) an antibiotic resistance gene.
Transforming Bacteria with Recombinant Plasmid
Inserting a gene into a plasmid vector is an important first step in the gene cloning process. However, if the ultimate goal is to produce a large amount of a particular protein, the plasmid must replicate to make sure that there are many copies of the gene and the gene of interest must be expressed, meaning the gene is utilized to produce the encoded protein. Both activities can only occur inside a cell. Therefore, in this lab we will put a recombinant plasmid into E. coli bacteria through a process that is called transformation, so named because it changes the DNA content of the bacteria.
The plasmid will be taken up by bacteria where it replicates, and its genes will be expressed using the bacterial cellular machinery. If a gene of interest has been inserted into the plasmid vector, the bacteria produces the product encoded by that gene.
In this exercise, you will carry out the transformation of E. coli bacteria using a recombinant plasmid that contains a gene that produces colored proteins.
Bacterial Transformation
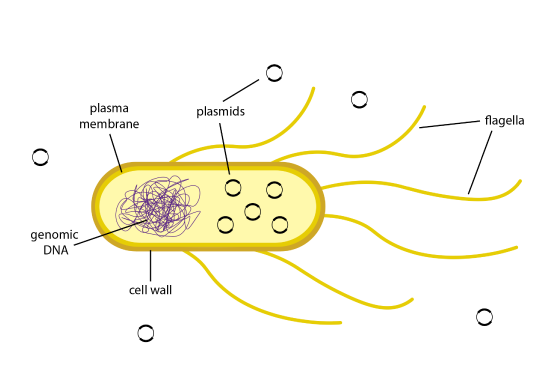
Once a recombinant plasmid is made that contains a gene of interest, such as insulin, the plasmid can enter bacterial cells by a process called transformation. Figure 13.1 illustrates transformation. The uptake of DNA from the environment of a bacterial cell occurs with a very low efficiency in nature. E. coli bacteria have complex plasma membranes that separate the external environment from the internal environment of the cell and carefully regulate which substances can enter and exit the cell. In addition, the cell wall is negatively charged and repels negatively charged DNA molecules.
Cells that have been treated to become competent are more efficient at taking in DNA from their surrounding environment. Competent cells can be made by treating the bacteria with a calcium solution. Calcium ions are positively charged, and will neutralize the negatively charged outer membrane on the E. coli bacteria. With the positive charge now coating the membrane, the inherently negatively charged DNA molecules will move through the plasma membranes and into the cell. The transformation efficiency can be further increased by stressing the cells in a heat shock. By changing the temperature of the cells drastically from cold to warm, the plasma membranes become more fluid and create pores in them. The plasmid DNA can travel from the environment through these pores and enter the cell. The cells are then plunged back into a cold temperature, which causes the pores to close and the plasmid DNA to remain inside the cell.
However, even competent cells do not always uptake the plasmid. For some plasmid DNA molecules, only about 1 in 10,000 cells will be transformed. When so few cells have taken in the plasmid, how will you be able to identify transformed cells? When designing a recombinant plasmid, one of the requirements is to add a gene for an antibiotic resistance. This way, the bacteria can be grown in the media with an antibiotic added to it, and only cells that have the resistance gene, such as those that express the recombinant plasmid, will be able to grow.
From Plasmid DNA to Protein
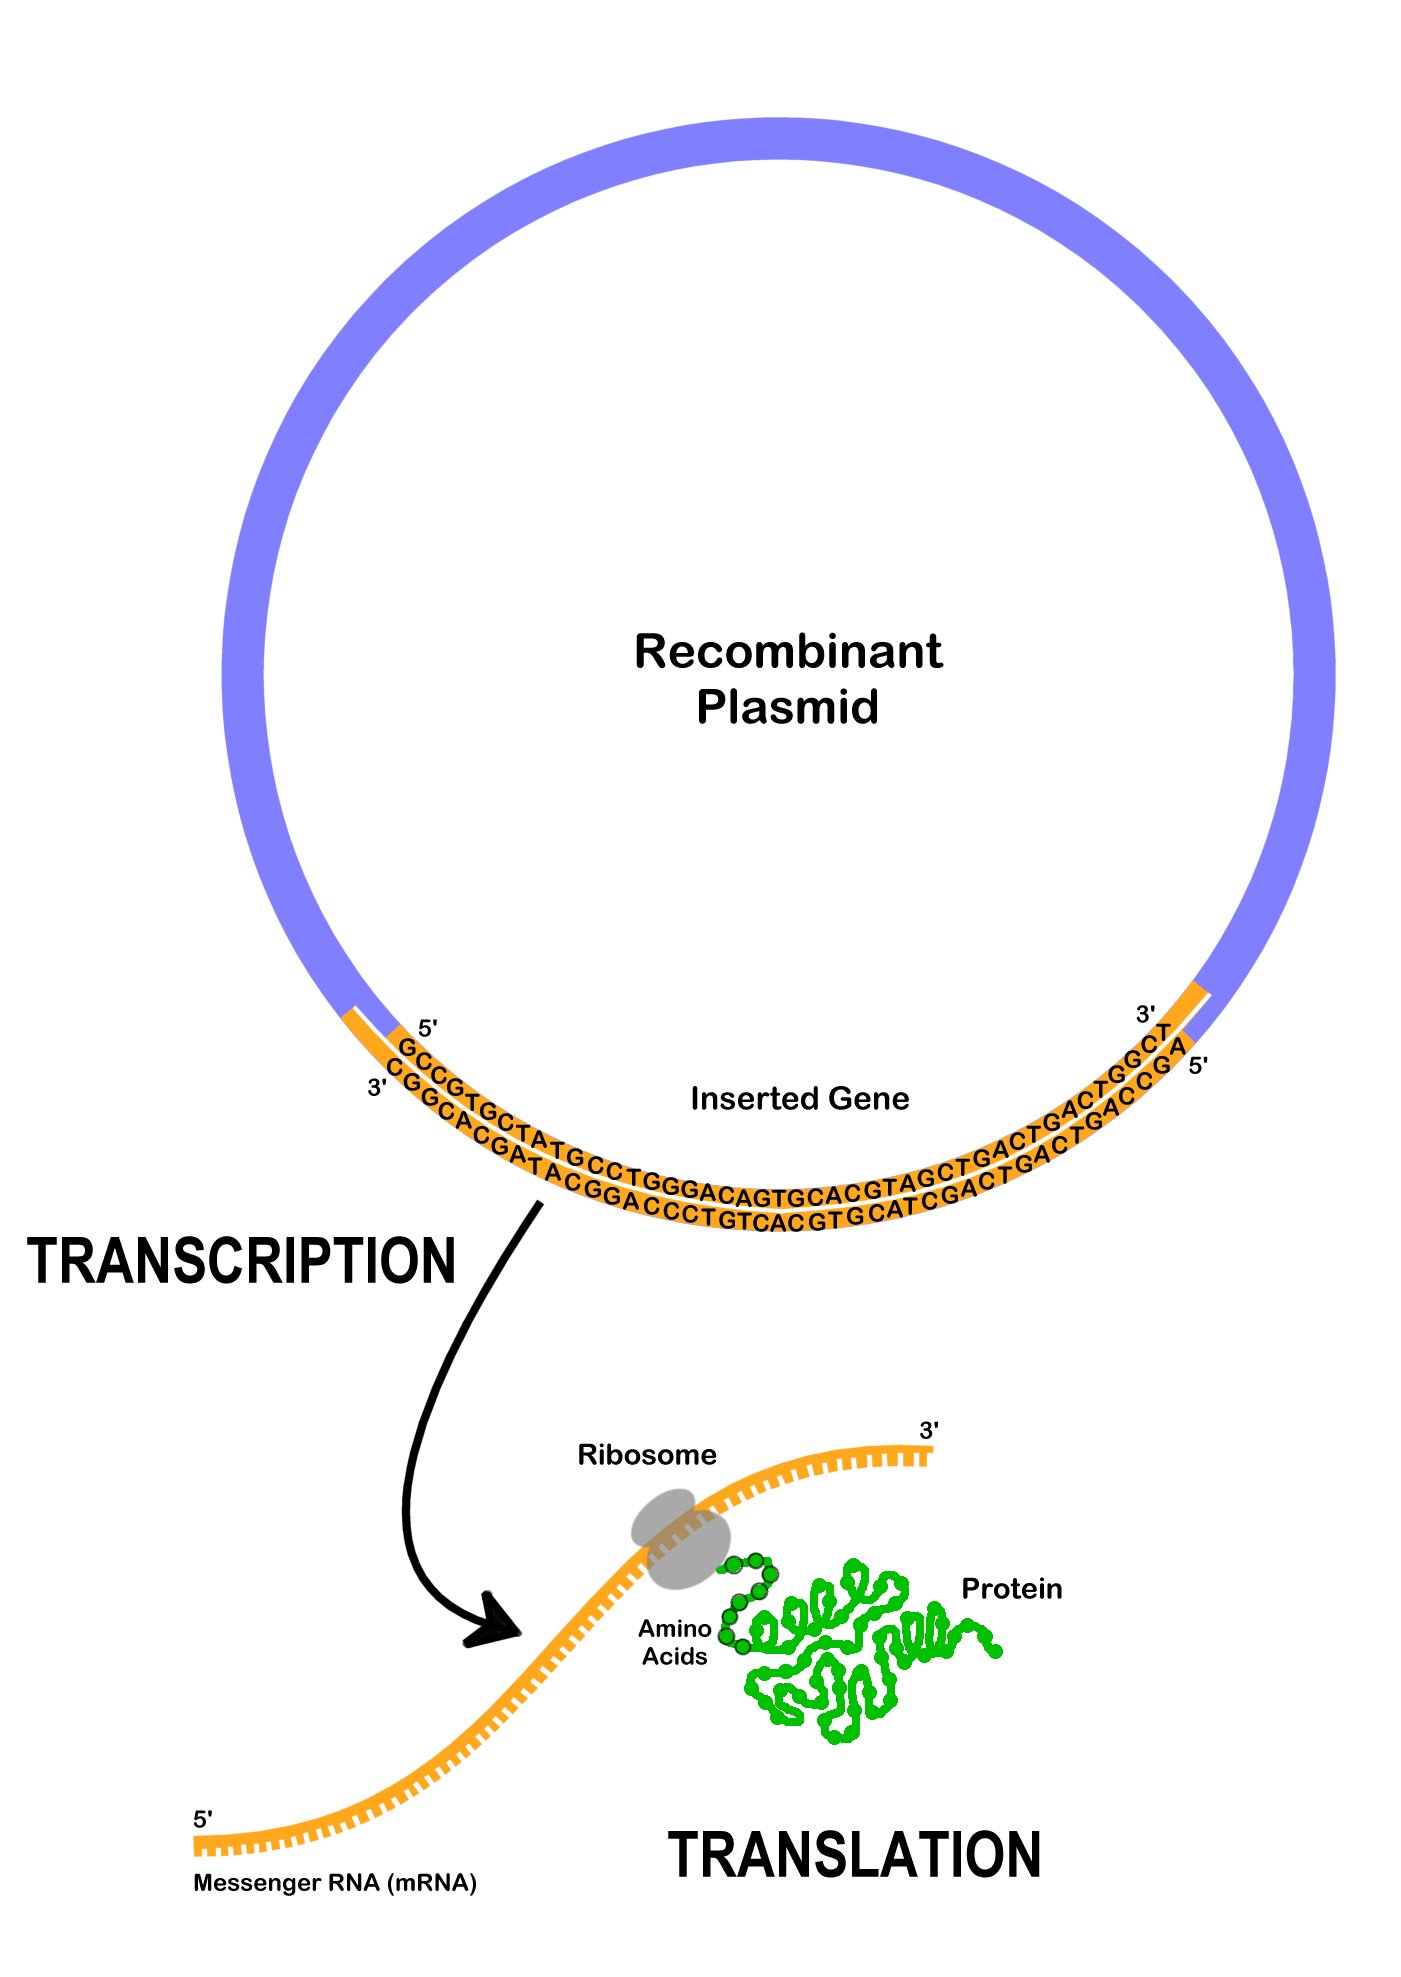
After a recombinant plasmid enters a bacterial cell, the cell begins to express the genes on it. DNA polymerase locates the ori- the origin of replication, and starts to replicate the plasmid using the bacterial cell’s machinery. Multiple copies of the recombinant plasmid can enable the bacterial cell to express large amounts of a protein. Usually, a bacterial cell will only make the protein of interest, after it is induced to do so by adding a chemical which will promote the transcription of the gene. Recall that to express the gene encoding the protein on the recombinant plasmid, DNA is transcribed to mRNA, which is then translated to protein (Figure 13.2). The expressed proteins may affect the visible traits when observing the bacteria colonies.
Recombinant plasmids and other forms of genetic engineering is possible because all living organisms use DNA as a platform to encode genetic information. Genes from different organisms can be expressed in other organisms like bacteria since they are encoded in DNA. The DNA instructions can be transferred, and other organisms can express foreign traits.
Proteins have many different functions inside and cells. They are made up of smaller subunits, amino acids, which are encoded by DNA nucleotides. A specific three nucleotide sequence that codes for a single amino acid is called a codon. For example, the codon TTG codes for the amino acid tryptophan, whereas the codon AAG codes for the amino acid lysine. In many cases, more than one codon can encode the same amino acid. For example, AAA is also a codon for lysine. In addition, there are informational codons, such as the start codon (ATG) and the stop codon (TTA), which show where in the DNA sequence the code for the protein begins and ends.
Transforming Bacteria with Plasmids
In this laboratory experiment you will transform E. coli bacteria cells with plasmids. You will be using E. coli that has been made competent with a calcium chloride treatment, and form two different testing groups: a negative control cell group that does not have plasmids added to it, and the experimental group that has the plasmids added. After the cells are heat-shocked, they will be grown under various testing conditions:
- The control group on nutrient agar (a type of growth media that bacteria thrive on).
- The control group on nutrient agar with an antibiotic added.
- The experimental group on nutrient agar.
- The experimental group on nutrient agar with an antibiotic.
- The experimental group on nutrient agar, antibiotic and an inducer (such as IPTG).
By examining the growth of bacteria under these conditions, you can verify that your procedure worked, and you can identify the bacteria transformed with the added plasmid. How will you know if you are successful? In the examples for plasmids we have recommended for this exercise, the recombinant bacteria will have a new and highly visible trait: It will now produce colored protein, which makes the cells themselves colored! As the bacteria multiply on the media, they form visible collections of cells called colonies. Each colony represents the decedents of the original bacterial cell that landed on that spot on the medium and began to replicate. Thus colonies are clones (exact copies) of the cell that began the replication process.
The relevant components of your plasmid are the gene for the colored protein, the inducible promoter, and the ampicillin resistance gene (ampR). The ampR gene confers resistance to the antibiotic ampicillin. (Biotechnologists call these genes selectable markers because only bacteria having the gene will survive in the presence of an antibiotic.) If the inducer is present in the bacteria, the promoter will be “turned on” so RNA polymerase can transcribe the gene of interest. This will allow protein to be produced.
Prelab Questions
Discuss the following amongst yourselves. Be ready to share your thoughts with the rest of the class.
- Ampicillin is a derivative of the antibiotic penicilliin. It disrupts cell wall formation in bacterial cells which kills the cells. However, our recombinant plasmid contains a gene that provides antibiotic resistance by producing a protein that breaks down ampicillin. Why do we include ampicillin in the test medium?
- What will happen if the transformed cells do not grow in the presence of the chemical inducer?
- In the experiment, you will add the control and experimental groups of cells onto different media combinations. What do you predict for each condition? Fill in Table 1 by indicating if you predict growth or no growth, and if growth, will there be minimal growth or lots of growth.
Read through the Procedures below and outline the steps, using words and a flowchart in your lab notebook.
|
Medium |
No plasmid control |
Treatment with plasmid |
|---|---|---|
|
Nutrient Agar |
||
|
Nutrient Agar + Ampicillin |
||
|
Nutrient Agar + Ampicillin + Inducer |
Transforming E. coli
MATERIALS
Reagents
- Plasmid – in microfuge tube
- Nutrient Broth (NB) – in microfuge tube
- Competent E. coli cells (CC) – in microfuge tube (Always keep CC tube on ice)
- 3 agar plates:
Plate 1: NA
Plate 2: NA/amp
Plate 3: NA/amp/ind
Supplies and Equipment
- P-20 micropipette
- P-200 micropipette
- Pipette tip box (for P-20, P-200)
- Microfuge tube rack
- Two 1.5 mL microfuge tubes
- Permanent marker
- Disposable gloves
- Crushed ice in a Styrofoam cup (fill cup first with ice before taking CC tube.)
- Pack of cell spreaders (do not remove spreaders from pack until directed to do so)
- Timer or clock
- Floating microfuge tube rack
- 42°C water bath
- 37°C incubator
- Tape
- Waste container
- Biohazard bag (for supplies that handle cells)
SAFETY
Check your protocol and follow all safety measures and wear proper attire prior to conducting the experiment.
Practice aseptic technique while using E. coli or other live specimens in a laboratory setting. Aseptic technique is the practice of taking precautions to limit potential contamination to both the person performing the experiment, and to the sample/s. Please note the following:
- Wear gloves when working with bacteria.
- Avoid touching contaminated areas which includes anything that has touched bacteria. Notify your instructor ASAP if an accident takes place, such as a spill.
- Put all supplies that have been exposed to bacteria into either a biohazard bag, or a designated biowaste container. These contaminated supplies may include pipette tips, cell spreaders, and microfuge tubes.
- Keep agar plates closed at all times after removing them from the incubator.
- Always wash your hands for 20 seconds with soap and water before leaving the lab.
PROCEDURE
- Make sure you have all the reagents in a tube rack.
- Retrieve a chilled CC tube and put in the cup of crushed ice. Keep the competent cells cold at all times. Hold the tube by the rim, not the bottom.
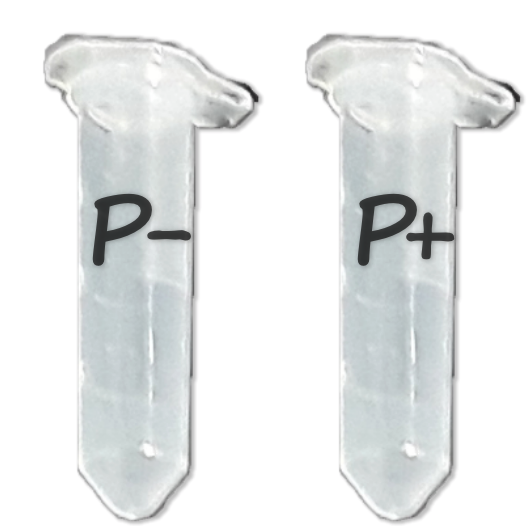
- Label the top and sides of two new microfuge tubes with “P-” and “P+”.
- Put the P– and P+ tubes with the CC tube on ice.
To ensure the best results possible, it is crucial that each step is followed exactly. Limit any possible contamination to the materials, yourself, and surroundings. - Add E. coli competent cells (CC tube) to both the P- and P+ tubes.
- Take the P-200 pipette, set to 50 µL and put on a tip.
- Holding the CC tube by the rim, gently resuspend the cells by slowly pumping between the first and no stop with the pipette (a gentle downward plunger motion to the first resistance point then a gentle upward motion to the top plunger position).
- Add 50 µL of cells to the P+ tube and place the P+ tube on ice immediately. Discard the tip into the sharps container.
- Grab a new pipette tip. Repeat for the P- tube. Discard the tip. Both P- and P+ tubes should be on ice and contain 50 µL of competent cells.
- Add plasmid to the P+ tube only.
- Take the P-20 pipette, set to 10 µL and put on a tip.
- Remove 10 µL of the plasmid and add it to the P+ tube. Mix together by slowly pumping between the first and no stop 2-3 times then place the tube back on ice.
- Put the P- and P+ tubes on ice for 15 minutes.
- While the tubes are chilling, obtain your agar plates and marker. Do not open the plates during this step
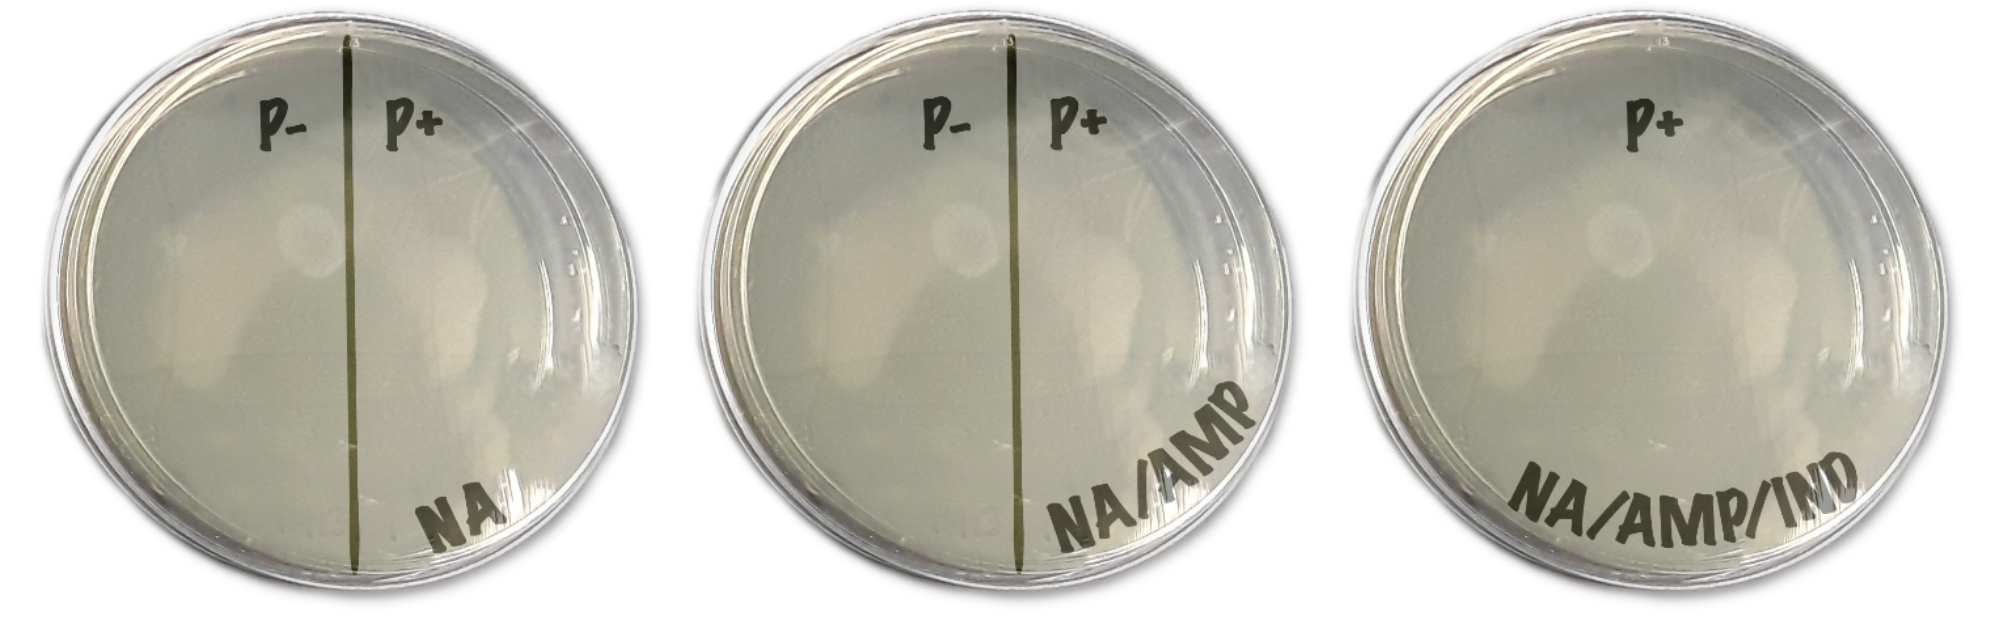
- Each agar plate contains different media- one of Nutrient Agar only (NA), one of Nutrient Agar + ampicillin (NA/AMP), and one of Nutrient Agar + ampicillin + inducer (NA/AMP/IND). These may be labeled with a stripe pattern or written on the plate
- Do not open the plates. Turn every plate upside-down; the agar should be on top. Label the agar side with 1) date 2) group number 3) class period. Try to write small along the bottom edge of the plate.
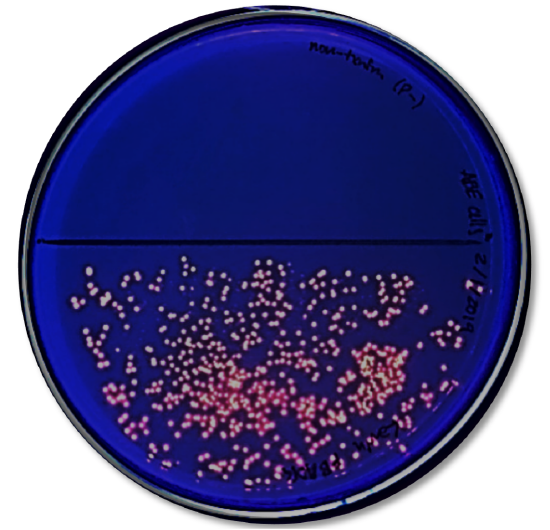
- Next, draw a line down the middle of the NA and NA/AMP plates. One half is labeled as “P-” and the other is “P+”. The NA/AMP/IND is only labeled “P+”. They should look similar to Fig 4
- After the P- and P+ tubes have been on ice for 15 minutes, keep the tubes on ice and bring the ice cup over to the 42°C water bath. You will also need your timer/clock. Put both tubes into a floating microfuge tube rack, then place it into the water bath for precisely 45 seconds.
- As soon as the 45 seconds pass, immediately put the tubes back into the ice cup and keep on ice for a minimum of 1 minute.
- Add Nutrient Broth (NB) to the P- and P+ tubes.
- Take the P-200 pipette, set to 150 µL and put on a tip.
- Remove 150 µL of NB and add to the P- tube. Mix together by slowly pumping between the first and no stop with the pipette. Discard the tip into the biowaste container.
- Get a new pipette tip. Repeat the same process for the P+ tube.
- Keep the tubes at room temperature for 15 minutes. If you are running short on time, this step can be shortened.
- Add cells from the P– tube onto your NA and NA/amp plates. Keep the plates right side up so the agar is on the bottom. You add cells to the surface of the agar (not the plastic lid).
- Take the P-200 pipette, set to 50 µL and put on a tip
- Take the P- tube. Slowly pump the pipette between the first and no stop with the pipette to resuspend the cells. Remove 50 µL of the cells.
- Lift the lid of the NA plate like a “clamshell” to leave a large enough gap to deliver the cells, while lowering the risk of airborne contamination. Add the 50 µL of cells to the P- half of the plate. Close the plate and prepare to spread the cells.
- Repeat this for the NA/AMP plate by resuspending the P- tube cells with the pipette and same tip. Add 50 µL of the cells to P- side of the NA/AMP plate using the clamshell method again. Discard the tip into the sharps container.
- Spread the cells from the P– tube on your NA and NA/amp plates. You must spread your plates in this order.
- Open the sterilized cell spreader package. Take a single spreader out and hold it only by the end you removed it by. Be careful not to touch the other end of the spreader to anything but the cells and agar. Close the package.
- Using the “clamshell” method, open the NA lid and spread the cells on the P- half of the plate. Gently hold the spreader flat against the surface of the agar; treat it gently as if you were handling gelatin. Close the plate.
- Repeat the same technique for the NA/AMP plate on the P- side using the same spreader. Once you are finished, discard the spreader into the designated biowaste container.
- Add cells from the P+ tube to your NA, NA/amp, and NA/amp/ind plates:
- Take the P-200 pipette, double check it is set to 50 µL and put on a tip.
- Take the P+ tube. Slowly pump the pipette between the first and no stop with the pipette to resuspend the cells. Remove 50 µL of the cells.
- Open the NA plate again like a clamshell to deliver 50 µL of cells to the P+ half of the plate. Close the plate.
- Repeat this for the NA/AMP plate by resuspending the cells with the pipette and same tip. Add 50 µL of cells to the P+ half of the plate. Close the plate.
- Repeat this for the NA/AMP/IND plate by resuspending the cells with the pipette and same tip. Add 50 µL of cells two times to the entire plate. There is a total of 100 µL of P+ cells added to the plate and must cover the entire surface when spread. Close the plate.
- Spread the P+ cells on the NA, NA/AMP and NA/AMP/IND plates. You must spread your plates in this order.
- Open the cell spreader package again and take out a single spreader, only touching the handle. Do Be careful to not touch the other end of the spreader to anything but the cells and agar.
- Using the clamshell method, open the NA lid and spread the cells on the P+ half of the plate. Gently hold the spreader flat against the surface of the agar; treat it gently as if you were handling gelatin. Close the plate.
- Using the same spreader, repeat the same technique for the NA/AMP plate on the P+ side .
- Repeat the same technique for the NA/AMP/IND plate except the cells must be spread across the entire plate, not just one half. Rotate the plate gently to evenly disperse the cells with the spreader. Once you are finished, discard the spreader into the designated biowaste container.
- Keep all plates right side up for 5 minutes until the liquid is fully absorbed into the plate. Stack the plates together and tape them, labeling the tape with your class period, group number and date.
- Put the plates upside down (agar side on top) into the 37°C incubator to prevent condensation from forming and falling on the cells.
- Put anything that touched the cells into the biohazard bag, including pipette tips, microfuge tubes and cell spreaders. Wipe down tabletops with disinfectants and wash hands.
- Incubate the plates at 37°C for 24-36 hours and look for growth. Keep the plates closed.
- Put the agar plates into the biohazard bag when told to do so.
Analysis
- Look at the results of your transformation. Fill out Table 2 with observations on whether you see growth or not on the different media.
- Do your actual results match your predicted results? If not, what differences do you see and what are some explanations for these differences?
- How many colored colonies were present on your NA/AMP/IND plate?
|
Medium |
No plasmid control |
Treatment with plasmid |
|---|---|---|
|
Nutrient Agar |
||
|
Nutrient Agar + Ampicillin |
||
|
Nutrient Agar + Ampicillin + Inducer |
Study Questions
- Why would colored colonies form on the NA/AMP/IND plate and not the NA/AMP plate?
- What are some possible reasons for colored colonies to form on the NA/AMP plate?
- Extrachromosomal DNA in bacteria, like a recombinant plasmid, can replicate within the cell without the rest of the cell’s DNA replicating. This can lead to multiple plasmids within a cell. Why is this important?
- Previously, you learned about the interactions between DNA, RNA, proteins and traits. Explain how an inserted gene such as one in plasmid DNA, is expressed as a trait.
- How can bacteria make proteins from foreign DNA, such as human insulin or a protein from a jellyfish like green fluorescent protein (GFP)?
- What would happen if we grew the transformed bacteria in the presence of a different antibiotic such as kanamycin, instead of ampicillin?