
16.7: Procedure for Indirect Serologic Testing
- Page ID
- 122750

A. The RPR® Card Test for Syphilis (demonstration)
1. Label 6 test tubes as follows: 1:1, 1:2, 1:4, 1:8, 1:16, and 1:32.
2. Using a 1.0 ml pipette, add 0.5 ml of 0.9% saline solution into tubes 1:2, 1:4, 1:8, 1:16, and 1:32.
3. Add 0.5 ml of the patient's serum to the 1:1 tube (undiluted serum).
4. Add another 0.5 ml of serum to the saline in the 1:2 tube and mix. Remove 0.5 ml from the 1:2 tube and add it to the 1:4 tube and mix. Remove 0.5 ml from the 1:4 tube, add to the 1:8 tube and mix. Remove 0.5 ml from the 1:8 tube, add to the 1:16 tube and mix. Remove 0.5 ml from the 1:16 tube, add to the 1:32 tube and mix. Remove 0.5 ml from the 1:32 tube and discard. The dilution of the serum is summarized in Fig. 19.

5. Using the capillary pipettes provided with the kit, add a drop of each serum dilution to separate circles of the RPR card. Spread the serum over the entire inner surface of the circle with the tip of the pipette, using a new pipette for each serum dilution.
6. Using the RPR antigen dispenser, add a drop of known RPR antigen to each circle. Do not let the needle of the dispenser touch the serum. Using disposable stirrers, mix the known RPR antigen with the serum in each circle.
7. Place the slide on a shaker and rotate for a maximum of 4 minutes.
8. Read the results as follows:
- A definite clumping of the charcoal particles is reported as reactive (R).
- Answer
-
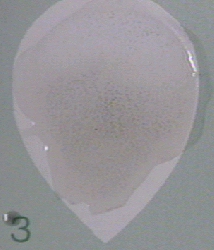
Figure \(\PageIndex{1}\): A Positive RPR Serologic Test for Syphilis. Clumping of the carbon particles indicates the person's serum contains nonspecific antilipid (reagin) antibodies. (Copyright; Gary E. Kaiser, Ph.D. The Community College of Baltimore County, Catonsville Campus CC-BY-3.0 )
- No clumping is reported as non-reactive (N).
- Answer
-
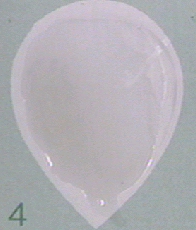
Figure \(\PageIndex{1}\): A Negative RPR Serologic Test for Syphilis. Clumping of the carbon particles indicates the person's serum contains nonspecific antilipid (reagin) antibodies. (Copyright; Gary E. Kaiser, Ph.D. The Community College of Baltimore County, Catonsville Campus CC-BY-3.0 )
The greatest serum dilution that produces a reactive result is the titer. For example, if the dilutions turned out as follows, the titer would be reported as 1:4 or 4 dils.
| 1:1 | 1:2 | 1:4 | 1:8 | 1:16 | 1:32 |
|---|---|---|---|---|---|
|
R |
R |
R |
N |
N |
N |
B. The Serologic Tests for Infectious Mononucleosis (demonstration)
1. Place one drop of each of the patient's serum in circles on the test slide.
2. Add one drop of thedyed, color-enhanced horse erythrocytes containing Paul-Bunnell antigens (the known antigen) to each circle next to the patient's serum and mix with the disposable applicator sticks.
3. Rock the card gently for 2 minutes,and observe for agglutination of the horse erythrocytes. Agglutination of the red bllod cells indicates the presence of heterophile antibodies.
- Agglutination of the red bllod cells indicates the presence of heterophile antibodies.
- Answer
-
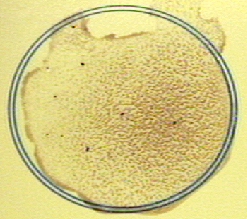
Figure \(\PageIndex{1}\): A Positive Qualitative Serologic Test for Infectious Mononucleosis. Clumping of the horse erythrocytes containing Paul-Bunnel antigens in their cell membrane indicates the person's serum contains heterophile antibodies. (Copyright; Gary E. Kaiser, Ph.D. The Community College of Baltimore County, Catonsville Campus CC-BY-3.0 )
C. The Serologic Tests for Systemic Lupus Erythematosus (SLE) (demonstration)
1. Add one drop of each of the patient's serum to separate circles on the test slide.
2. Add one drop of the Latex-Deoxyribonucleoprotein reagent (the known antigen, deoxyribonucleoprotein adsorbed to latex particles) to each serum sample and mix with disposable applicator sticks.
3. Rock the slide gently for 3 minutes and look for agglutination of the latex particles. Agglutination of the latex particles indicates the presence of antinuclear antibodies associated with SLE.
- Agglutination of the latex particles indicates the presence of antinuclear antibodies associated with SLE.
- Answer
-
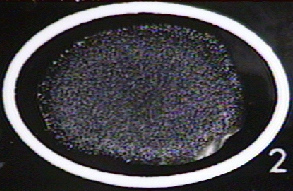
Figure \(\PageIndex{1}\): A Positive Qualitative Serologic Test forSLE. Clumping of the latex particles indicates the person's serum contains anti-deoxyribonucleoprotein antibodies. (Copyright; Gary E. Kaiser, Ph.D. The Community College of Baltimore County, Catonsville Campus CC-BY-3.0 )
D. The FTA-ABS Test for Syphilis (Indirect Fluorescent Antibody Technique
Observe the 35mm slide of a positive FTA-ABS test.
- Agglutination of the latex particles indicates the presence of antinuclear antibodies associated with SLE.
- Answer
-
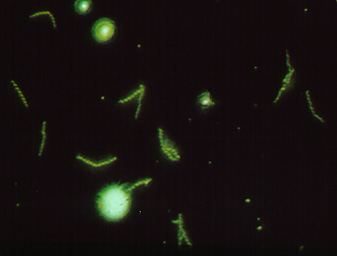
Figure \(\PageIndex{1}\): A Positive FTA Test for Syphilis Viewed with a Flourescent Microscope. Note the fluorescing spirochetes. (Copyright; Gary E. Kaiser, Ph.D. The Community College of Baltimore County, Catonsville Campus CC-BY-3.0 )
E. The EIA and WB Tests for HIV Antibodies
Observe the illustrations of the EIA test and the WB test shown above to detect antibodies against HIV antigens.
Contributors and Attributions
Dr. Gary Kaiser (COMMUNITY COLLEGE OF BALTIMORE COUNTY, CATONSVILLE CAMPUS)