
5.2: Procedure for slide preparation prior to staining
- Page ID
- 123349
The procedure for slide preparation prior to staining is as follows:
1. If the culture is taken from an agar medium:
a. First place a small piece of tape at one end of the slide and label it with the name of the bacterium you will be placing on that slide .
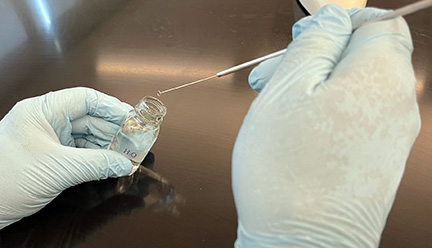
b. Sterilize your inoculating loop and place one loop full of deionized water from your dropper bottle on your slide. (See Fig. \(\PageIndex{1}\), Step 1, Fig. \(\PageIndex{1}\), Step 2, and Fig. \(\PageIndex{1}\), Step 3.
|
Fig. \(\PageIndex{1}\), Step 1: Remove a Loopfull of Deionized Water |
Fig. \(\PageIndex{1}\), Step 2: Place the Loopfull of Water on the Slide |
Fig. \(\PageIndex{1}\), Step3: Correct Amount of Water on the Slide |
|---|---|---|
 |
 |
 |
| Using your sterilized inoculating loop, remove one loopfull of water from your bottle of deionized water. | Place the loopfull of water on your slide. | A loopfull of deionized water on your slide. |
| (Copyright; Gary E. Kaiser, Ph.D. The Community College of Baltimore County, Catonsville Campus CC-BY-3.0) | ||
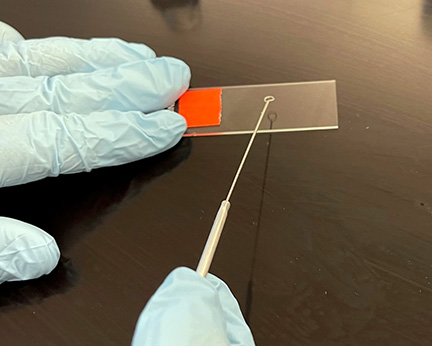
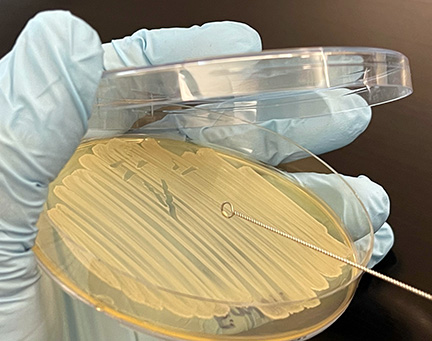
c. Using the edge of your sterile inoculating loop, aseptically remove a small amount of the culture from the agar surface (see Fig. \(\PageIndex{2}\), Step 1) and gently touch it several times to the drop of water until the water becomes visibly cloudy. (See Fig. \(\PageIndex{2}\), Step 2, and Fig. \(\PageIndex{1}\), Step 3.)
|
Fig. \(\PageIndex{2}\), Step 1: Using the Edge of the Loop, Remove Bacteria from the Petri Plate |
Fig. \(\PageIndex{2}\), Step 2: Add Small Amount of Bacteria to the Water |
Fig. \(\PageIndex{2}\), Step3: Correct Amount of Bacteria Added to the Water |
|---|---|---|
 |
 |
 |
| Using the edge of your sterilized inoculating loop, remove a small amount of bacteria from the petri plate. | Repeatedly touch the edge of the inoculating loop until the water just turns cloudy. Be carefull not to add too much bacteria. | This is the correct amount of bacteria to add to the water for a good bacterial smear. |
| (Copyright; Gary E. Kaiser, Ph.D. The Community College of Baltimore County, Catonsville Campus CC-BY-3.0) | ||
d. Incinerate the remaining bacteria on the inoculating loop. If too much culture is added to the water, you will not see stained individual bacteria.
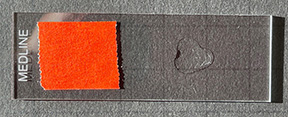
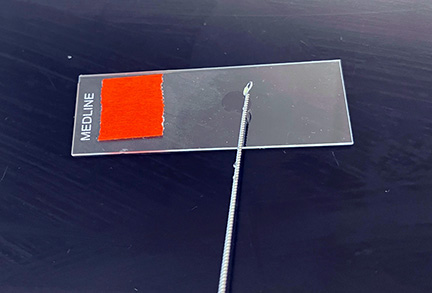
e. After the inoculating loop cools, spread the suspension over the slide to form a thin film. (See Fig. \(\PageIndex{3}\).)
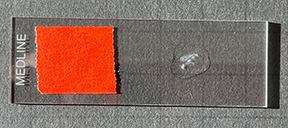
f. Allow this thin suspension to completely air dry. (See Fig. \(\PageIndex{4}\)) The smear must be completely dry before the slide is fixed!

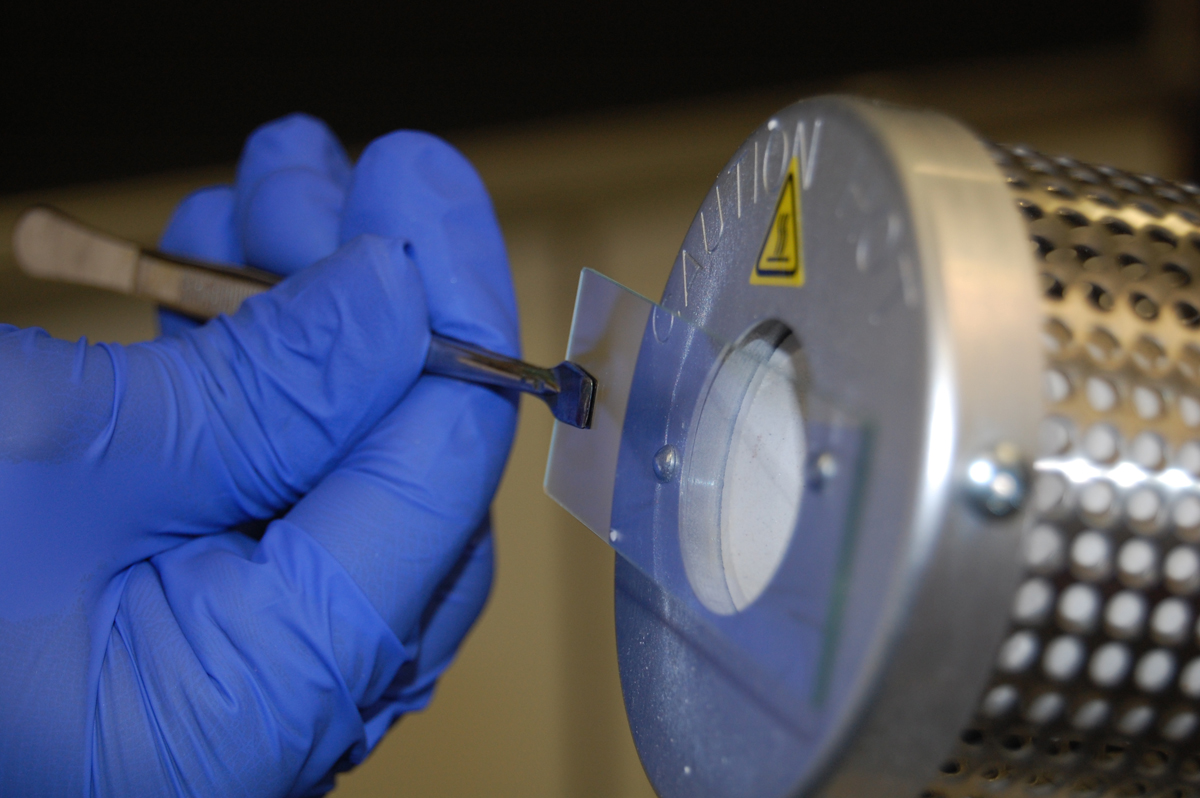
g. If your professor instructs you to heat-fix the bacteria to the slide, pick up the air-dried slide with provided close pin and hold the bottom of the slide opposite the smear against the opening of the bacto-incinerator for 10 seconds. as demonstrated by your instructor. (See Fig. \(\PageIndex{5}\).) If the slide is not heated enough, the bacteria will be washed off the slide. If it is overheated, the bacteria structural integrity can be damaged.
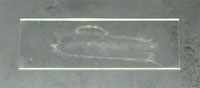
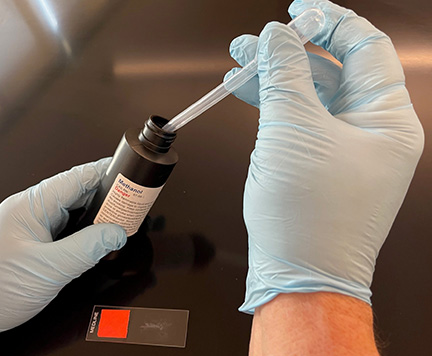
h. If your professor instructs you to fix the bacteria to the slide using methanol, add 2-3 drops of 95% methanol to the air-dried smear of bacteria (see Fig. \(\PageIndex{6}\)) and let sit for 2 minutes or until the methanol evaporates. Let the slide again air dry before staining.
2. If the organism is taken from a broth culture:
a. First place a small piece of tape at one end of the slide and label it with the name of the bacterium you will be placing on that slide.
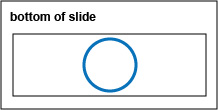
b. Using a sharpie, draw a circle about the size if a nickel on the bottom of your microscope slide. (See Fig. \(\PageIndex{7}\), step 1.)
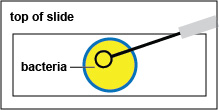
d. Using the inoculating loop, spread the suspension over the area delineated by the circle to form a thin film.
e. Allow this thin suspension to completely air dry.
f. If your professor instructs you to heat-fix the bacteria to the slide, pick up the air-dried slide with provided close pin and hold the bottom of the slide opposite the smear against the opening of the bacto-incinerator for 10 seconds. (See Fig. \(\PageIndex{5}\) above.) If the slide is not heated enough, the bacteria will be washed off the slide. If it is overheated, the bacteria structural integrity can be damaged.
g. If your professor instructs you to fix the bacteria to the slide using methanol, add several drops of 95% methanol to the air-dried smear of bacteria (see Fig. \(\PageIndex{6}\), above) and let sit for 2 minutes. Pick up the slide and allow the excess methanol to drain off. Let the slide again air dry before staining.
In order to understand how staining works, it will be helpful to know a little about the physical and chemical nature of stains. Stains are generally salts in which one of the ions is colored. (A salt is a compound composed of a positively charged ion and a negatively charged ion.) For example, the dye methylene blue is actually the salt methylene blue chloride which will dissociate in water into a positively charged methylene blue ion which is blue in color and a negatively charged chloride ion which is colorless.
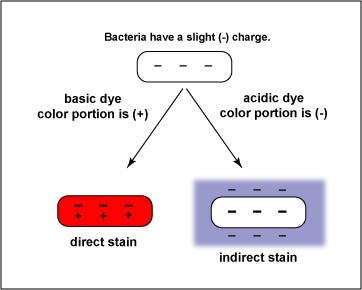
Dyes or stains may be divided into two groups: basic and acidic. If the color portion of the dye resides in the positive ion, as in the above case, it is called a basic dye (examples: methylene blue, crystal violet, safranin). If the color portion is in the negatively charged ion, it is called an acidic dye (examples: nigrosin, congo red).
Because of its chemical nature, the cytoplasm of all bacterial cells has a slight negative charge when growing in a medium of near neutral pH. Therefore, when using a basic dye, the positively charged color portion of the stain combines with the negatively charged bacterial cytoplasm (opposite charges attract) and the organism becomes directly stained (See Fig. \(\PageIndex{8}\).) An acidic dye, due to its chemical nature, reacts differently. Since the color portion of the dye is on the negative ion, it will not readily combine with the negatively charged bacterial cytoplasm (like charges repel). Instead, it forms a deposit around the organism, leaving the organism itself colorless. (see Fig. \(\PageIndex{8}\).) Since the organism is seen indirectly, this type of staining is called indirect or negative, and is used to get a more accurate view of bacterial size, shapes, and arrangements.
In today's lab, we will make both direct and indirect stains of several microorganisms.
Contributors and Attributions
Dr. Gary Kaiser (COMMUNITY COLLEGE OF BALTIMORE COUNTY, CATONSVILLE CAMPUS)