17.4: Materials and Procedures
- Page ID
- 40263
\( \newcommand{\vecs}[1]{\overset { \scriptstyle \rightharpoonup} {\mathbf{#1}} } \)
\( \newcommand{\vecd}[1]{\overset{-\!-\!\rightharpoonup}{\vphantom{a}\smash {#1}}} \)
\( \newcommand{\id}{\mathrm{id}}\) \( \newcommand{\Span}{\mathrm{span}}\)
( \newcommand{\kernel}{\mathrm{null}\,}\) \( \newcommand{\range}{\mathrm{range}\,}\)
\( \newcommand{\RealPart}{\mathrm{Re}}\) \( \newcommand{\ImaginaryPart}{\mathrm{Im}}\)
\( \newcommand{\Argument}{\mathrm{Arg}}\) \( \newcommand{\norm}[1]{\| #1 \|}\)
\( \newcommand{\inner}[2]{\langle #1, #2 \rangle}\)
\( \newcommand{\Span}{\mathrm{span}}\)
\( \newcommand{\id}{\mathrm{id}}\)
\( \newcommand{\Span}{\mathrm{span}}\)
\( \newcommand{\kernel}{\mathrm{null}\,}\)
\( \newcommand{\range}{\mathrm{range}\,}\)
\( \newcommand{\RealPart}{\mathrm{Re}}\)
\( \newcommand{\ImaginaryPart}{\mathrm{Im}}\)
\( \newcommand{\Argument}{\mathrm{Arg}}\)
\( \newcommand{\norm}[1]{\| #1 \|}\)
\( \newcommand{\inner}[2]{\langle #1, #2 \rangle}\)
\( \newcommand{\Span}{\mathrm{span}}\) \( \newcommand{\AA}{\unicode[.8,0]{x212B}}\)
\( \newcommand{\vectorA}[1]{\vec{#1}} % arrow\)
\( \newcommand{\vectorAt}[1]{\vec{\text{#1}}} % arrow\)
\( \newcommand{\vectorB}[1]{\overset { \scriptstyle \rightharpoonup} {\mathbf{#1}} } \)
\( \newcommand{\vectorC}[1]{\textbf{#1}} \)
\( \newcommand{\vectorD}[1]{\overrightarrow{#1}} \)
\( \newcommand{\vectorDt}[1]{\overrightarrow{\text{#1}}} \)
\( \newcommand{\vectE}[1]{\overset{-\!-\!\rightharpoonup}{\vphantom{a}\smash{\mathbf {#1}}}} \)
\( \newcommand{\vecs}[1]{\overset { \scriptstyle \rightharpoonup} {\mathbf{#1}} } \)
\( \newcommand{\vecd}[1]{\overset{-\!-\!\rightharpoonup}{\vphantom{a}\smash {#1}}} \)
\(\newcommand{\avec}{\mathbf a}\) \(\newcommand{\bvec}{\mathbf b}\) \(\newcommand{\cvec}{\mathbf c}\) \(\newcommand{\dvec}{\mathbf d}\) \(\newcommand{\dtil}{\widetilde{\mathbf d}}\) \(\newcommand{\evec}{\mathbf e}\) \(\newcommand{\fvec}{\mathbf f}\) \(\newcommand{\nvec}{\mathbf n}\) \(\newcommand{\pvec}{\mathbf p}\) \(\newcommand{\qvec}{\mathbf q}\) \(\newcommand{\svec}{\mathbf s}\) \(\newcommand{\tvec}{\mathbf t}\) \(\newcommand{\uvec}{\mathbf u}\) \(\newcommand{\vvec}{\mathbf v}\) \(\newcommand{\wvec}{\mathbf w}\) \(\newcommand{\xvec}{\mathbf x}\) \(\newcommand{\yvec}{\mathbf y}\) \(\newcommand{\zvec}{\mathbf z}\) \(\newcommand{\rvec}{\mathbf r}\) \(\newcommand{\mvec}{\mathbf m}\) \(\newcommand{\zerovec}{\mathbf 0}\) \(\newcommand{\onevec}{\mathbf 1}\) \(\newcommand{\real}{\mathbb R}\) \(\newcommand{\twovec}[2]{\left[\begin{array}{r}#1 \\ #2 \end{array}\right]}\) \(\newcommand{\ctwovec}[2]{\left[\begin{array}{c}#1 \\ #2 \end{array}\right]}\) \(\newcommand{\threevec}[3]{\left[\begin{array}{r}#1 \\ #2 \\ #3 \end{array}\right]}\) \(\newcommand{\cthreevec}[3]{\left[\begin{array}{c}#1 \\ #2 \\ #3 \end{array}\right]}\) \(\newcommand{\fourvec}[4]{\left[\begin{array}{r}#1 \\ #2 \\ #3 \\ #4 \end{array}\right]}\) \(\newcommand{\cfourvec}[4]{\left[\begin{array}{c}#1 \\ #2 \\ #3 \\ #4 \end{array}\right]}\) \(\newcommand{\fivevec}[5]{\left[\begin{array}{r}#1 \\ #2 \\ #3 \\ #4 \\ #5 \\ \end{array}\right]}\) \(\newcommand{\cfivevec}[5]{\left[\begin{array}{c}#1 \\ #2 \\ #3 \\ #4 \\ #5 \\ \end{array}\right]}\) \(\newcommand{\mattwo}[4]{\left[\begin{array}{rr}#1 \amp #2 \\ #3 \amp #4 \\ \end{array}\right]}\) \(\newcommand{\laspan}[1]{\text{Span}\{#1\}}\) \(\newcommand{\bcal}{\cal B}\) \(\newcommand{\ccal}{\cal C}\) \(\newcommand{\scal}{\cal S}\) \(\newcommand{\wcal}{\cal W}\) \(\newcommand{\ecal}{\cal E}\) \(\newcommand{\coords}[2]{\left\{#1\right\}_{#2}}\) \(\newcommand{\gray}[1]{\color{gray}{#1}}\) \(\newcommand{\lgray}[1]{\color{lightgray}{#1}}\) \(\newcommand{\rank}{\operatorname{rank}}\) \(\newcommand{\row}{\text{Row}}\) \(\newcommand{\col}{\text{Col}}\) \(\renewcommand{\row}{\text{Row}}\) \(\newcommand{\nul}{\text{Nul}}\) \(\newcommand{\var}{\text{Var}}\) \(\newcommand{\corr}{\text{corr}}\) \(\newcommand{\len}[1]{\left|#1\right|}\) \(\newcommand{\bbar}{\overline{\bvec}}\) \(\newcommand{\bhat}{\widehat{\bvec}}\) \(\newcommand{\bperp}{\bvec^\perp}\) \(\newcommand{\xhat}{\widehat{\xvec}}\) \(\newcommand{\vhat}{\widehat{\vvec}}\) \(\newcommand{\uhat}{\widehat{\uvec}}\) \(\newcommand{\what}{\widehat{\wvec}}\) \(\newcommand{\Sighat}{\widehat{\Sigma}}\) \(\newcommand{\lt}{<}\) \(\newcommand{\gt}{>}\) \(\newcommand{\amp}{&}\) \(\definecolor{fillinmathshade}{gray}{0.9}\)Materials
- Student Stock Cultures (Each group should have all Stock Culture Organisms on a TSA plate and TSA slant, and in a TSB broth)
- Staphylococcus saprophyticus
- Staphylococcus epidermidis
- Lactococcus lactis
- Kocuria rosea
- Sarcina aurantiaca
- Sporosarcina ureae
- Moraxella catarrhalis
- Mycobacterium smegmatis
- Corynebacterium pseudodiphtheriticum
- Bacillus cereus
- Alcaligenes viscolactis
- Escherichia coli
- Citrobacter freundii
- Serratia marcescens
- Pseudomonas fluorescens
- Enterobacter aerogenes
- Glass bowls with Sanisol
- Glass Slides
- Stain trays
- Water bottles (partially fill with DI water)
- Slide holders or clothespins
- Stains: Crystal violet, methylene blue, malachite green, safranin
- Lens cleaner/lens cleaning kits
- Streptococcusmutans culture
- Rhodospirillum rubrum culture
Procedures
Suggested bacteria for staining (all from Student Stock, except Streptococcusmutans—1 broth culture per table), however, with your group, stain and observe as many as possible from your entire stocks:
- Moraxella catarrhalis
- Bacillus cereus
- Streptococcusmutans
- Staphylococcus epidermidis
- Esherichia coli
- Micrococcus luteus
- Rhodospirillum rubrum
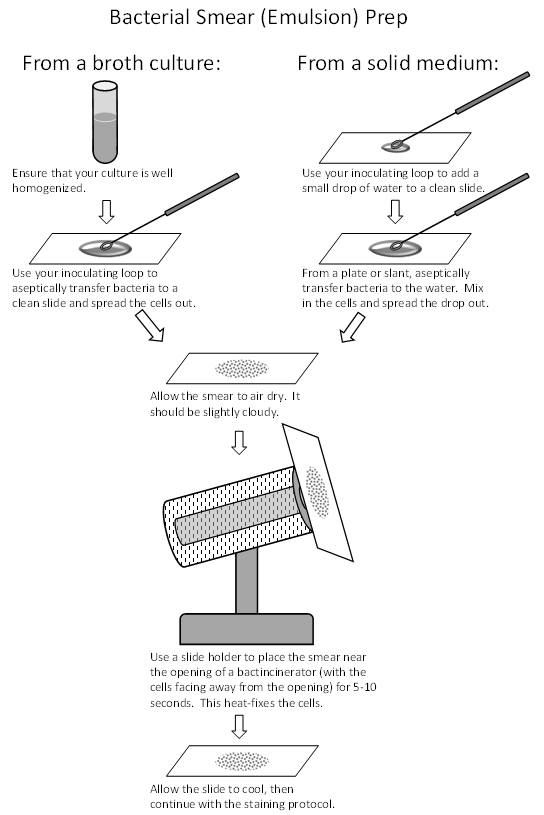
Smear prep
From a broth culture-
- Aseptically place a loopful of culture onto a cleaned slide, and spread the liquid around in an area about the size of a quarter. You may do more than one organism on a slide; just make sure they don’t touch.
- Set the slide aside to completely air dry. DO NOT heat at all during this time, nor wave the slide around to speed up the drying process. Heating the slide prior to air-drying will cause production of aerosols, which is a biosafety hazard, and will also dry the cells tooquickly and distort their shape and size.
- Heat-fix the slide by holding it (use a slide holder) over a hot plate or in front of the incinerator for 5-10 seconds, until it is warm to the touch. Overheating will distort the cells and may cause aerosol formation. Heat-fixing kills the cells and adheres them to the slide so that they don’t come off during the stain procedures.
From solid media (a plate or slant)-
- Place a small drop of DI water, from your water bottle, onto the edge of your staining tray. Take your loop a transfer a loopful of the water to a cleaned slide.
- Aseptically pick a small amount of bacteria (do not pick a big glob, just lightly touch a colony, it will be plenty) from the media and place it into the drop of water, and spread around in an area about the size of a quarter to suspend and spread the bacteria evenly around the slide. Avoid clumpy or thick, pasty smears! You may do more than one organism on a slide; just make sure they don’t touch.
- Set the slide aside to completely air dry. DO NOT heat at all during this time, nor wave the slide around to speed up the drying process. Heating the slide prior to air-drying will cause production of aerosols, which is a biosafety hazard, and will also dry the cells too quickly and distort their shape and size.
- Heat-fix the slide by holding it (use a slide holder) over a hot plate or in front of the incinerator for 5-10 seconds, until it is warm to the touch. Overheating will distort the cells and may cause aerosol formation. Heat-fixing kills the cells and adheres them to the slide so that they don’t come off during the stain procedures.
Cautions
- A thick smear will prevent you from seeing individual cells easily and determine the cell morphology, arrangement, and size. Conversely, too few cells will be difficult to find. It will take practice to have just the right amount, but in general, less is better!
- Make sure slides are completely air dried, and do not over heat-fix.

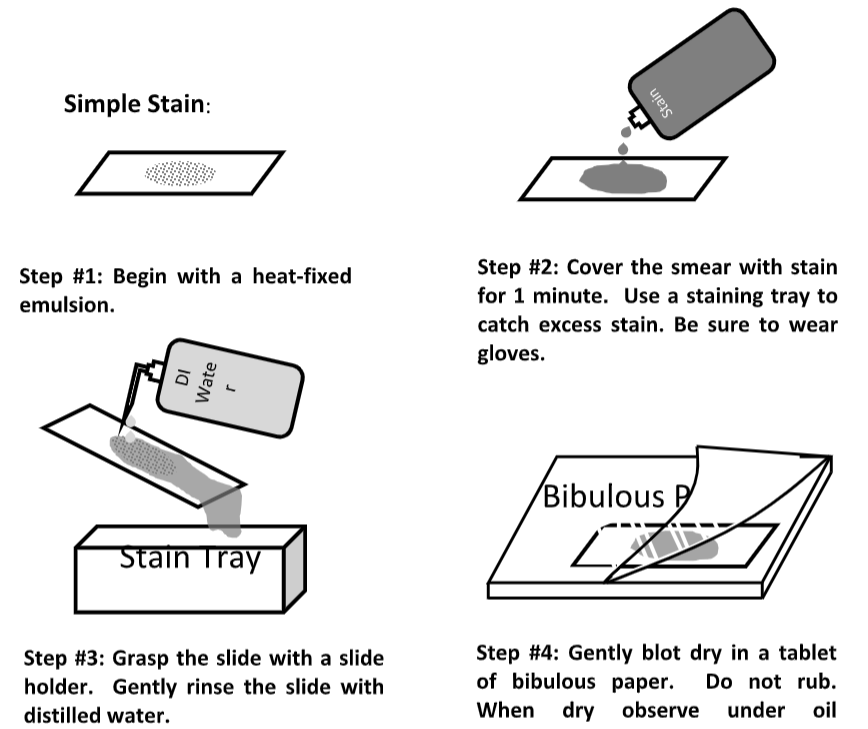
Simple Stain
- Use an air-dried, heat-fixed smear and flood the smear with one of the basic stains above for 1 minute.
- Rinse the slide with DI water.
- Blot slide gently with bibulous paper. Tap gently; do not rub the paper as this may smear your prep.
- Observe at under oil immersion, 100x objective.

Results
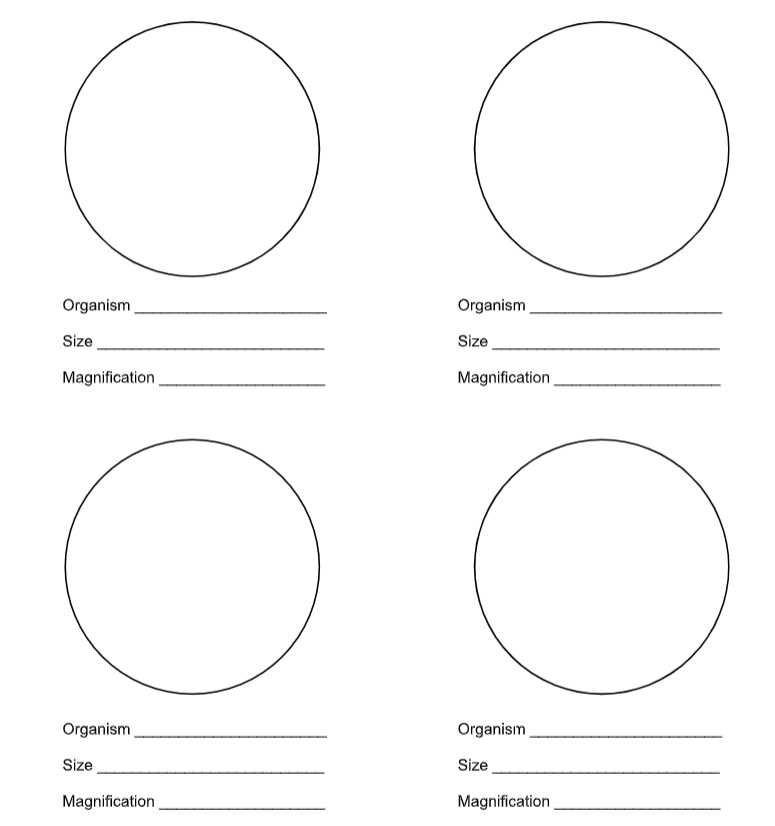
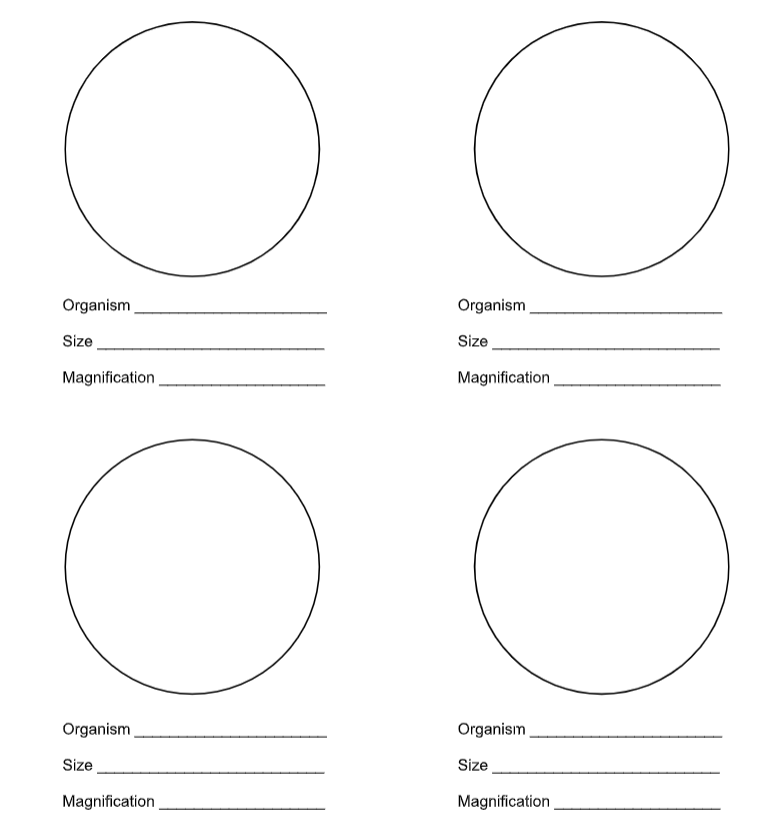
Draw the bacteria you observed, including cell size, use additional paper if needed.


|
Organism |
Stain used |
Cell Morphology |
Cell Arrangement |
Size (um) |
|---|---|---|---|---|
|
|
|
|
|
|
|
|
|
|
|
|
|
|
|
|
|
|
|
|
|
|
|
|
|
|
|
|
|
|
|
|
|
|
|
|
Contributors and Attributions
Kelly C. Burke (College of the Canyons)


