
2.4: Materials and Procedures
- Page ID
- 40158

\( \newcommand{\vecs}[1]{\overset { \scriptstyle \rightharpoonup} {\mathbf{#1}} } \)
\( \newcommand{\vecd}[1]{\overset{-\!-\!\rightharpoonup}{\vphantom{a}\smash {#1}}} \)
\( \newcommand{\id}{\mathrm{id}}\) \( \newcommand{\Span}{\mathrm{span}}\)
( \newcommand{\kernel}{\mathrm{null}\,}\) \( \newcommand{\range}{\mathrm{range}\,}\)
\( \newcommand{\RealPart}{\mathrm{Re}}\) \( \newcommand{\ImaginaryPart}{\mathrm{Im}}\)
\( \newcommand{\Argument}{\mathrm{Arg}}\) \( \newcommand{\norm}[1]{\| #1 \|}\)
\( \newcommand{\inner}[2]{\langle #1, #2 \rangle}\)
\( \newcommand{\Span}{\mathrm{span}}\)
\( \newcommand{\id}{\mathrm{id}}\)
\( \newcommand{\Span}{\mathrm{span}}\)
\( \newcommand{\kernel}{\mathrm{null}\,}\)
\( \newcommand{\range}{\mathrm{range}\,}\)
\( \newcommand{\RealPart}{\mathrm{Re}}\)
\( \newcommand{\ImaginaryPart}{\mathrm{Im}}\)
\( \newcommand{\Argument}{\mathrm{Arg}}\)
\( \newcommand{\norm}[1]{\| #1 \|}\)
\( \newcommand{\inner}[2]{\langle #1, #2 \rangle}\)
\( \newcommand{\Span}{\mathrm{span}}\) \( \newcommand{\AA}{\unicode[.8,0]{x212B}}\)
\( \newcommand{\vectorA}[1]{\vec{#1}} % arrow\)
\( \newcommand{\vectorAt}[1]{\vec{\text{#1}}} % arrow\)
\( \newcommand{\vectorB}[1]{\overset { \scriptstyle \rightharpoonup} {\mathbf{#1}} } \)
\( \newcommand{\vectorC}[1]{\textbf{#1}} \)
\( \newcommand{\vectorD}[1]{\overrightarrow{#1}} \)
\( \newcommand{\vectorDt}[1]{\overrightarrow{\text{#1}}} \)
\( \newcommand{\vectE}[1]{\overset{-\!-\!\rightharpoonup}{\vphantom{a}\smash{\mathbf {#1}}}} \)
\( \newcommand{\vecs}[1]{\overset { \scriptstyle \rightharpoonup} {\mathbf{#1}} } \)
\( \newcommand{\vecd}[1]{\overset{-\!-\!\rightharpoonup}{\vphantom{a}\smash {#1}}} \)
\(\newcommand{\avec}{\mathbf a}\) \(\newcommand{\bvec}{\mathbf b}\) \(\newcommand{\cvec}{\mathbf c}\) \(\newcommand{\dvec}{\mathbf d}\) \(\newcommand{\dtil}{\widetilde{\mathbf d}}\) \(\newcommand{\evec}{\mathbf e}\) \(\newcommand{\fvec}{\mathbf f}\) \(\newcommand{\nvec}{\mathbf n}\) \(\newcommand{\pvec}{\mathbf p}\) \(\newcommand{\qvec}{\mathbf q}\) \(\newcommand{\svec}{\mathbf s}\) \(\newcommand{\tvec}{\mathbf t}\) \(\newcommand{\uvec}{\mathbf u}\) \(\newcommand{\vvec}{\mathbf v}\) \(\newcommand{\wvec}{\mathbf w}\) \(\newcommand{\xvec}{\mathbf x}\) \(\newcommand{\yvec}{\mathbf y}\) \(\newcommand{\zvec}{\mathbf z}\) \(\newcommand{\rvec}{\mathbf r}\) \(\newcommand{\mvec}{\mathbf m}\) \(\newcommand{\zerovec}{\mathbf 0}\) \(\newcommand{\onevec}{\mathbf 1}\) \(\newcommand{\real}{\mathbb R}\) \(\newcommand{\twovec}[2]{\left[\begin{array}{r}#1 \\ #2 \end{array}\right]}\) \(\newcommand{\ctwovec}[2]{\left[\begin{array}{c}#1 \\ #2 \end{array}\right]}\) \(\newcommand{\threevec}[3]{\left[\begin{array}{r}#1 \\ #2 \\ #3 \end{array}\right]}\) \(\newcommand{\cthreevec}[3]{\left[\begin{array}{c}#1 \\ #2 \\ #3 \end{array}\right]}\) \(\newcommand{\fourvec}[4]{\left[\begin{array}{r}#1 \\ #2 \\ #3 \\ #4 \end{array}\right]}\) \(\newcommand{\cfourvec}[4]{\left[\begin{array}{c}#1 \\ #2 \\ #3 \\ #4 \end{array}\right]}\) \(\newcommand{\fivevec}[5]{\left[\begin{array}{r}#1 \\ #2 \\ #3 \\ #4 \\ #5 \\ \end{array}\right]}\) \(\newcommand{\cfivevec}[5]{\left[\begin{array}{c}#1 \\ #2 \\ #3 \\ #4 \\ #5 \\ \end{array}\right]}\) \(\newcommand{\mattwo}[4]{\left[\begin{array}{rr}#1 \amp #2 \\ #3 \amp #4 \\ \end{array}\right]}\) \(\newcommand{\laspan}[1]{\text{Span}\{#1\}}\) \(\newcommand{\bcal}{\cal B}\) \(\newcommand{\ccal}{\cal C}\) \(\newcommand{\scal}{\cal S}\) \(\newcommand{\wcal}{\cal W}\) \(\newcommand{\ecal}{\cal E}\) \(\newcommand{\coords}[2]{\left\{#1\right\}_{#2}}\) \(\newcommand{\gray}[1]{\color{gray}{#1}}\) \(\newcommand{\lgray}[1]{\color{lightgray}{#1}}\) \(\newcommand{\rank}{\operatorname{rank}}\) \(\newcommand{\row}{\text{Row}}\) \(\newcommand{\col}{\text{Col}}\) \(\renewcommand{\row}{\text{Row}}\) \(\newcommand{\nul}{\text{Nul}}\) \(\newcommand{\var}{\text{Var}}\) \(\newcommand{\corr}{\text{corr}}\) \(\newcommand{\len}[1]{\left|#1\right|}\) \(\newcommand{\bbar}{\overline{\bvec}}\) \(\newcommand{\bhat}{\widehat{\bvec}}\) \(\newcommand{\bperp}{\bvec^\perp}\) \(\newcommand{\xhat}{\widehat{\xvec}}\) \(\newcommand{\vhat}{\widehat{\vvec}}\) \(\newcommand{\uhat}{\widehat{\uvec}}\) \(\newcommand{\what}{\widehat{\wvec}}\) \(\newcommand{\Sighat}{\widehat{\Sigma}}\) \(\newcommand{\lt}{<}\) \(\newcommand{\gt}{>}\) \(\newcommand{\amp}{&}\) \(\definecolor{fillinmathshade}{gray}{0.9}\)Materials
- 250 ml beaker with marked graduations
- 100 ml graduated cylinder, 25ml graduated cylinder
- Digital scale
- Glass slides
- Standard petri dish
- Small petri dish
- Small metric rulers
- Standard test tube
- Durham test tube
- 4 empty standard petri dishes labeled 5 ml, 10ml, 15ml, 20ml
- TSA Plate
- Small squares of Parafilm
- Transfer pipette
- 1 ml serological pipette
- 5 ml serological pipette
- Microfuge tubes and racks
- p20 Micropipette and tips
- p200 Micropipette and tips
- p1000 Micropipette and tips
- Colored water or coloring dye
- Beaker of RT water with thermometer beside the beaker
- Beaker of water in an ice bath with thermometer beside the ice bath
- Beaker of water on a hot plate, boiling with boiling stones, with thermometer beside the hot plate
Procedures
Weight:
- Weigh an empty 500ml beaker and record its weight to the nearest tenth of a gram (remember to tare the scale first). Then measure 50ml of water in a graduated cylinder, add it to the beaker, and weigh the beaker again.
Weight of empty beaker: __________________
Weight of beaker plus water: _______________
Calculate the weight of the water: ______________________
How much would 1ml of water weigh? ___________________
- To get some reference points for weight, pick several items to weigh, including your cell phone. Other items could be a pen, a coin, your wallet, etc. Take the weight of the item in grams on the scale and convert to the other values. Give the values below. NOTE: Enjoy having your cell phone out for this, in the future you will never have electronic items out in class.
|
Item |
kg |
g |
mg |
|---|---|---|---|
|
Cell Phone |
|
|
|
|
|
|
|
|
|
|
|
|
|
Length:
- Measure the l x w x h (mm) of a standard glass slide and give the dimensions below:
______________mm x ________________mm x ____________mm
l w h
- Measure the diameter and height of standard and small petri dishes:
Standard petri dish dimensions (d x h) in mm:
Small Petri dish dimensions (d x h) in mm:
- Measure the height and diameter of a standard test tube and a small “Durham” test tube:
Standard test tube dimensions (d x h) in mm:
Durham tube dimensions (d x h) in mm:
- View the bacterium E. coli via the microscope on display. Bacteria are very small organisms. E coli averages about 3um in length. As you look in the microscope, keep in mind that the E. coli is magnified 1000x. So it is very small indeed! The average lengths of several bacteria are given in um below. Convert these values to cm and mm.
|
Bacterium |
\(\mu\)m |
mm |
cm |
|---|---|---|---|
|
E. coli |
2 |
|
|
|
Bacillus cereus |
4 |
|
|
|
Streptococcus |
1 |
|
|
|
Rhodospirillum |
8 |
|
|
Volume:
- Fill a 2500ml beaker with 100ml of water using the 100ml marking on the beaker. Pour the water into a 100 ml graduated cylinder. What does the volume of the water read in the graduated cylinder (remember to read at the meniscus)?
Volume in the graduated cylinder: _____________________
If the volume is different than 100ml calculate the percent error of the 500ml beaker:
% Error = Exp-Obs/Obs x 100 (Note: there is no negative % error)
% Error =
- Use a 25ml graduated cylinder and measure the following volumes of water- 10ml, 15ml, and 25ml. Pour the water from each test tube into the 3 labeled petri dishes. Compare the volume of water in the 3 petri dishes with the volume of media in a normal TSA plate.
- What is the probable volume of media in the TSA plate? TSA Plate volume = ____________ml
- How many TSA plates could be made from 1L of prepared liquid media?
- Empty the petri dishes when done.
Pipetting practice:
As you do these exercises think about when and why you should use the different types of pipettes. Also make sure that you know how to measure with the serological pipette—this is a common source of confusion and therefore measurement mistakes.
Place a square of Parafilm on your lab bench. Use the tube of water at your bench (if colored water is available use it, or add coloring to the water).
- Transfer pipettes: Using a transfer pipette transfer 0.5ml from the beaker to the Parafilm (the water should bead up on the Parafilm). Using a 1.0 ml serological pipette withdraw 0.5 ml (read from the bottom up) of water from the beaker and dispense onto the Parafilm a few cm away from the first drop.
- Do the drops look the same size?
- Using the 1.0 serological pipette, pipette up the first drop you made with the transfer pipette. What was the actual volume of the water dispensed from the transfer pipette? ________________ml
- Is this what you expected? Why or why not do you think?
- When would it be appropriate to use a transfer pipette vs. a serological pipette?
- When is it more appropriate to use a serological pipette than a transfer pipette?
- Serological pipettes: Dry off the Parafilm square. Then, use a 5 ml pipette to transfer 1ml of the colored water to the Parafilm. Do the same with a 1ml serological pipette.
- The drops should look identical. Do they?
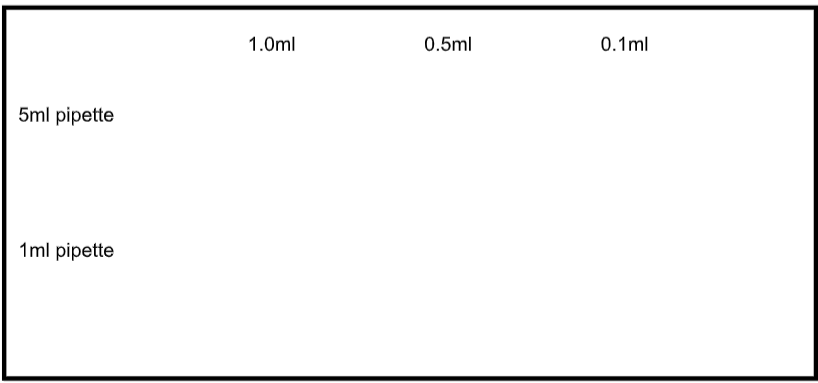
- Dry off the Parafilm again. Use a 5ml pipette and a 1ml pipette each, and transfer the following volumes to the Parafilm in two separate rows as in the pattern below: 1ml, 0.5ml, 0.1ml. Draw a picture of your drops below.
- When would you use a 5ml pipette instead of a 1ml pipette?
- When would you use a 1 ml pipette instead of a 5ml pipette?
- Fill a microfuge tube with the colored water using a transfer pipette, using a 5ml pipette to withdraw the contents. How much volume will the microfuge tube hold?
- Micropipettes: Micropipettes are most often used for very accurately measuring very small volumes. It would be difficult to measure 0.01ml with a 1.0ml pipette but easy with the appropriate micropipette. Each pipette uses a different pipette tip that fits snugly, and is calibrated with the pipette to withdraw and dispense the correct amount. Pipette tips can be ejected from the pipette without touching them, which can be very important when transferring microbial cultures! Pipette tips are disposed of in small biohazard buckets that are provided. Your instructor will review how to withdraw and dispense liquids and eject the pipette tips. Make sure that you understand how to do this prior to using a pipette.
The most commonly used micropipettes are the p20, p200, and p1000. The values 20, 200, and 1000 refer to the max volume (in \(\mu l\)) each pipette can deliver. Convert the following:
20ul = _______________ ml
200 ul = ______________ml
1000ul = _____________ml
Turning the thumbwheel gauge on the top portion of the pipette sets volumes for each. Be very careful when adjusting these. Do not over rotate the dial attempt to adjust the pipette to higher or lower than the range for that pipette. Doing so can damage the pipette. The range for each is:
p20 measures 2\(\mu\)l-20\(\mu l\)
p200 measures 20-200\(\mu l\)
p1000 measures 200-1000\(\mu l\)
- The gauge for each pipette is unique in the range it represents. Note what the gauge looks like, and what it actually represents:
| p20 | p200 | p1000 |
|---|---|---|
| 1 | 1 | |
| 0 | 0 | |
| 0 | 0 | |
| 1000.0\(\mu l\) | ||
| 1 | ||
| 0 | ||
| 10.0\(\mu l\) | 100.0\(\mu l\) | 0 |
| ____ ml | ____ ml | ____ ml |
- Make sure your piece of Parafilm is dried off again. With the p20 set the gauge to 100 and withdraw 10.0\(\mu l\) from your beaker of colored water and dispense onto the Parafilm. Set the p200 to 100 and withdraw and dispense 100.0\(\mu l\) of water onto the Parafilm. Set the p1000 to 100 and dispense 1000.0\(\mu l\) onto the Parafilm. Compare the sizes of the drops. Draw below:
- Micropipette challenge: Each person in your group should do the following. Use a p200 and dispense the following amounts of water (from your beaker of colored water) into a microfuge tube, resetting the thumbwheel as needed:
Transfer 20\(\mu l\), then an additional 35ul, and finally an additional 65ul. What is the total volume you have dispensed?
Total volume = _____________\(\mu l\)
Compare your microfuge tubes to your lab partners’. Do all the tubes appear to have the same volume?
Now, exchange microfuge tubes with each other so that no one has their own tube. Using a p200 set the gauge to the total volume you determined above and withdraw the liquid from the microfuge tube.
Were you able to withdraw the entire volume of the tube or is there some left in the tube?
Were there any air bubbles in the tip of the pipette?
What could be some sources of error in transferring these volumes?
Temperature:
Observe and record the temperature in Celsius in the three water samples. Handle the thermometers with care; they are easily broken. Place the thermometer in each beaker without letting the thermometer hit the bottom of the beaker and hold it for one minute, record the T and remove the thermometer and place it gently on the lab bench.
|
|
Temperature (C) |
|---|---|
|
RT beaker |
|
|
Ice bath beaker |
|
|
Hot plate beaker |
|
Contributors and Attributions
Kelly C. Burke (College of the Canyons)