
9.3: Upper Limb
- Page ID
- 53651

Upper Limb
For anatomists, the upper limb consists of the arm or brachium (the upper arm), the forearm or antebrachium (the lower arm), and the hand, consisting of eight wrist bones or carpal bones, five hand bones or metacarpals, and fourteen phalanges (sing. phalanx) . The arm consists of a single bone, the humerus. The forearm consists of two bones, the ulna and radius. And the hand consists of 27 bones total.

Above: The left upper limb with its components highlighted red, green, yellow, violet, blue, and purple and labeled.
The head of the humerus articulates with the glenoid cavity of the scapular forming the glenohumeral joint. Positioned near the head of the humerus is the greater tubercle (lateral) and lesser tubercle (anterior) where rotator cuff muscles attached to the scapula attach to the humerus. The deltoid tuberosity located distal to the humeral head mid-way down the shaft is a site where the deltoid muscle attaches to the humerus. Between the greater and lesser tubercles is a groove called the intertubercular sulcus, a location where the bicep tendon is positioned.

Above: The humerus (A) anterior view and (B) posterior view.
Above: Right humerus.
Many articulations are created by the radius and ulna, some between the two bones and others separately with the humerus. The head of the radius articulates with the capitulum of the humerus to create the rotating action of the forearm and hand. The action of rotating the forearm and hand so that the palm of the hand is facing posteriorly is called pronation; the action of rotating the forearm and hand so that the palm of the hand is facing anteriorly (as in normal anatomical position) is called supination.

Above: Distal images of the humerus where the elbow joint is formed. The top three images show the anterior view of the distal humerus highlighting the trochlea (articulates with trochlear notch of the ulna), capitulum (articulates with the head of the radius), coronoid fossa (articulates with the coronoid process of the ulna), and radial fossa (articulates with the head of the radius). The bottom image shows the posterior aspect of the distal humerus with the olecranon fossa colored in (articulates with the olecranon, aka olecranon process of the ulna).
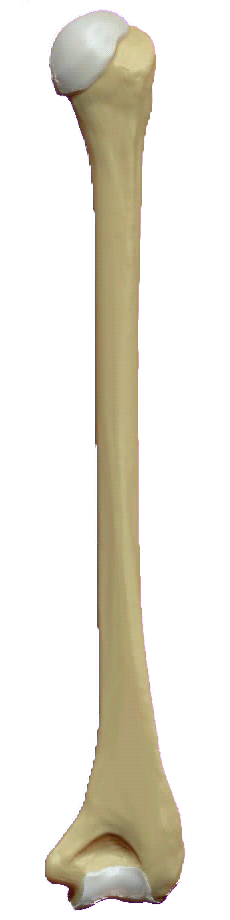
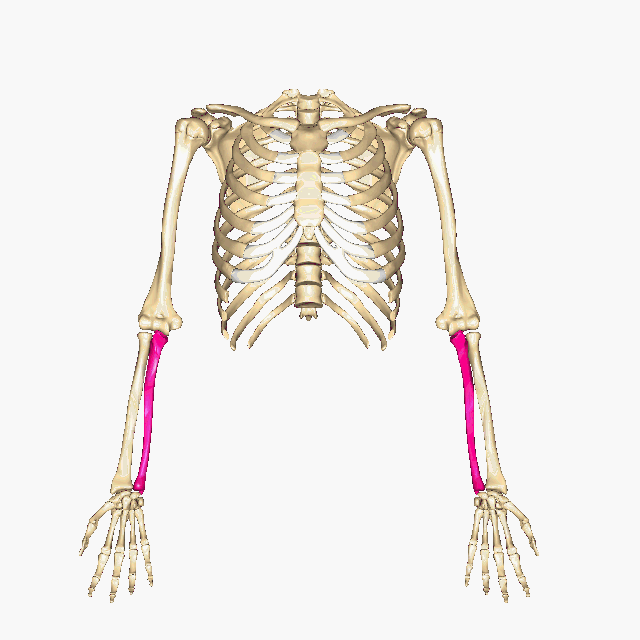
Above: Positions of radii.

Above: (A) Right radius and (B) left radius, anterior view.
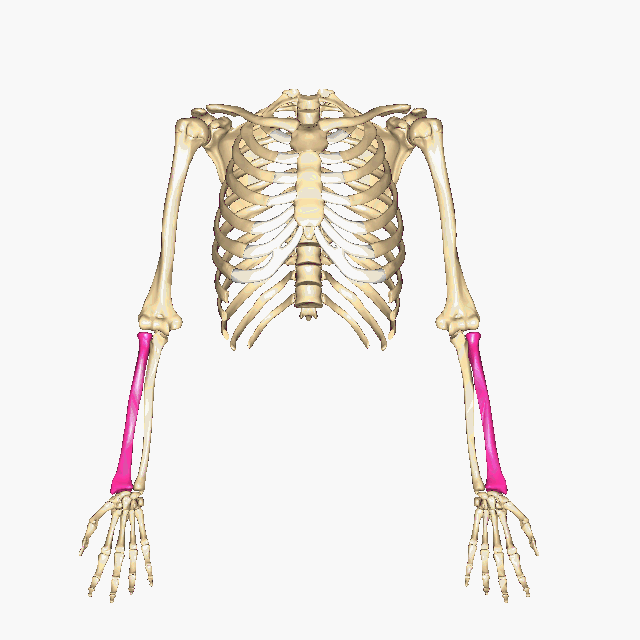
Above: Position of ulnae.

Above: (A) and (B) show the right ulna and (C) and (D) show the left ulna. (A) and (D) show medial views of the right and left ulnae, respectively. (B) and (C) shown anterior views of the right and left ulnae, respectively.
In order for the radius to rotate, it must also articulate with the ulna next to it. It does this in two places. Aside from articulating with the capitulum, the head of the radius also articulates with the radial notch (on the ulna) as it rotates. Similarly, at the distal end of the radius and ulna, the head of the ulna articulates with the ulnar notch (on the radius). Anatomical terms are usually named for their purpose, not necessarily what bone they are on; the radial notch is FOR the radius, so it is located ON the ulna, and the ulnar notch is FOR the ulna, so it is located ON the radius.
As for the ulna, the trochlear notch articulates with the trochlea on the humerus to allow a strong and stable flexing action at the elbow. Further, the coronoid and olecranon processes (on the ulna) articulate into the coronoid and olecranon fossae (on the humerus), respectively.
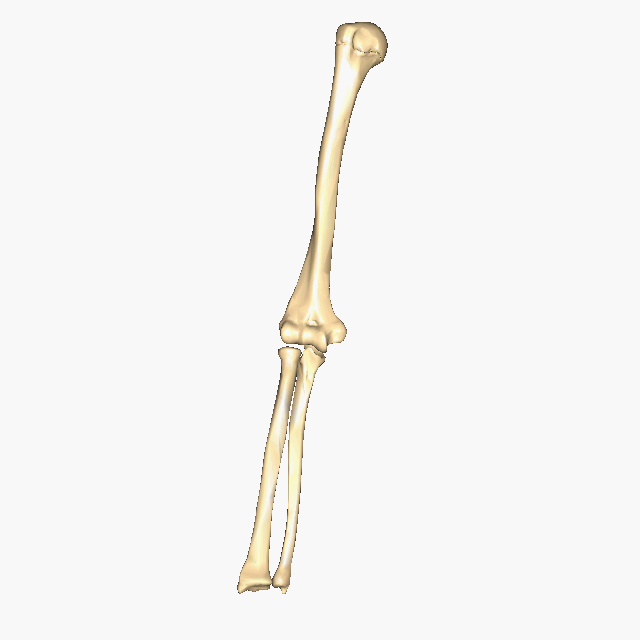
Above: Right humerus, radius, and ulna.

Above: (A) The right ulna and right radius articulating with an anteromedial view. (B) The left ulna and the left radius articulating with an anteromedial view.
Each hand has eight carpal, or wrist, bones: trapezoid, trapezium, scaphoid, capitate, lunate, hamate, pisiform, and triquetrum. The hand is supported by five metacarpal bones, numbered one through five with one relating to the thumb and five relating to the little finger or pinky finger. The bones of the digits are called

Above: The bones of the (A) right and (B) left hands, anterior views.
phalanges (sing. phalanx) where each is designated as being proximal, middle, or distal, depending on its position in relationship to the other phalanges, and given a number with the same system as the metacarpal numbering. The thumb only has two phalanges, proximal phalanx #1 and distal phalanx #1, and therefore lacks a middle phalanx bone.
Attributions
- "Anatomy 204L: Laboratory Manual (Second Edition)" by Ethan Snow, University of North Dakota is licensed under CC BY-NC 4.0
- "BodyParts3D/Anatomography" by The Database Center for Life Science is licensed under CC BY-SA 2.1
- "BIOL 250 Human Anatomy Lab Manual SU 19" by Yancy Aquino, Skyline College is licensed under CC BY-NC-SA 4.0
- "Capitulum-and-trochlea.jpg" by DrJanaOfficial is licensed under CC BY-SA 4.0
- "Coronoid-Fossa.jpg" by DrJanaOfficial is licensed under CC BY-SA 4.0
- "Full Anterior View of Right Radius.png" by DrJanaOfficial is licensed under CC BY-SA 4.0
- "Full Lateral View of Right Radius.png" by DrJanaOfficial is licensed under CC BY-SA 4.0
- "Full Medial View of Right Radius.png" by DrJanaOfficial is licensed under CC BY-SA 4.0
- "Full Posterior View of Right Radius.png" by DrJanaOfficial is licensed under CC BY-SA 4.0
- "Humerus 3d Model.gif" by DrJanaOfficial is licensed under CC BY-SA 4.0
- "Humerus-views.png" by DrJanaOfficial is licensed under CC BY-SA 4.0
- "Neck-of-Humerus.jpg" by DrJanaOfficial is licensed under CC BY-SA 4.0
- "Olecranon-fossa.jpg" by DrJanaOfficial is licensed under CC BY-SA 4.0
- "Radial-Fossa.jpg" by DrJanaOfficial is licensed under CC BY-SA 4.0
- "Radius and Ulna - Forearm Bones.jpg" by DrJanaOfficial is licensed under CC BY-SA 4.0
- "Trochlea.jpg" by DrJanaOfficial is licensed under CC BY-SA 4.0