
2.5: Results
- Page ID
- 52226

\( \newcommand{\vecs}[1]{\overset { \scriptstyle \rightharpoonup} {\mathbf{#1}} } \)
\( \newcommand{\vecd}[1]{\overset{-\!-\!\rightharpoonup}{\vphantom{a}\smash {#1}}} \)
\( \newcommand{\id}{\mathrm{id}}\) \( \newcommand{\Span}{\mathrm{span}}\)
( \newcommand{\kernel}{\mathrm{null}\,}\) \( \newcommand{\range}{\mathrm{range}\,}\)
\( \newcommand{\RealPart}{\mathrm{Re}}\) \( \newcommand{\ImaginaryPart}{\mathrm{Im}}\)
\( \newcommand{\Argument}{\mathrm{Arg}}\) \( \newcommand{\norm}[1]{\| #1 \|}\)
\( \newcommand{\inner}[2]{\langle #1, #2 \rangle}\)
\( \newcommand{\Span}{\mathrm{span}}\)
\( \newcommand{\id}{\mathrm{id}}\)
\( \newcommand{\Span}{\mathrm{span}}\)
\( \newcommand{\kernel}{\mathrm{null}\,}\)
\( \newcommand{\range}{\mathrm{range}\,}\)
\( \newcommand{\RealPart}{\mathrm{Re}}\)
\( \newcommand{\ImaginaryPart}{\mathrm{Im}}\)
\( \newcommand{\Argument}{\mathrm{Arg}}\)
\( \newcommand{\norm}[1]{\| #1 \|}\)
\( \newcommand{\inner}[2]{\langle #1, #2 \rangle}\)
\( \newcommand{\Span}{\mathrm{span}}\) \( \newcommand{\AA}{\unicode[.8,0]{x212B}}\)
\( \newcommand{\vectorA}[1]{\vec{#1}} % arrow\)
\( \newcommand{\vectorAt}[1]{\vec{\text{#1}}} % arrow\)
\( \newcommand{\vectorB}[1]{\overset { \scriptstyle \rightharpoonup} {\mathbf{#1}} } \)
\( \newcommand{\vectorC}[1]{\textbf{#1}} \)
\( \newcommand{\vectorD}[1]{\overrightarrow{#1}} \)
\( \newcommand{\vectorDt}[1]{\overrightarrow{\text{#1}}} \)
\( \newcommand{\vectE}[1]{\overset{-\!-\!\rightharpoonup}{\vphantom{a}\smash{\mathbf {#1}}}} \)
\( \newcommand{\vecs}[1]{\overset { \scriptstyle \rightharpoonup} {\mathbf{#1}} } \)
\( \newcommand{\vecd}[1]{\overset{-\!-\!\rightharpoonup}{\vphantom{a}\smash {#1}}} \)
Record the results of your experiments in the tables below.
A. Pouring plates:
Observe that your plates were poured properly--the bottom of the petri dish should be about half full and the media should be sterile, even, and contain few or no bubbles.
B. Aseptic transfers
Look for turbidity in the broth indicating growth of microorganisms. Record the turbidity of the Nutrient broth in the three tubes as + or -. Recall what your sterile Nutrient broth looked like before it was inoculated.
|
Nutrient broth tube |
Turbidity + or - |
|
"sterile control" |
|
|
"broth transfer" |
|
|
"colony transfer" |
|
Also note any other distinguishing characteristics (amount and location of turbidity, color, etc.) of the bacterial growth in the broth and note and record any differences between species of bacteria. An effective method for recording your results is to draw a picture of the tube and the appearance of the broth due to any growth.
C. Streak Plates
1. Check to see whether you obtained well-isolated single colonies on the agar streak plates. Describe and compare your results for each inoculum.
From Broth: Describe growth characteristics and make a sketch in the circle below.
.png?revision=1&size=bestfit&width=326&height=330)
From Agar: Describe growth characteristics and make a sketch in the circle below.
Based on your results, answer the following questions:
2. Were you able to separate and identify the two different bacterial species in your "mixed culture"?
3. Colony morphology can be an aid in the identification of microorganisms.
Although colony morphology cannot be employed as the sole identifying criterion, it is a useful trait in the classification of many common types of microorganisms. Five parameters are normally used to describe microbial colonies growing on an agar surface.
a. Size: pinpoint, small, medium, or large; range: < l mm - 3cm
b. Color: absolutely white, various degrees of pigmentation
c. Texture: the texture of the colony as determined by touching the colony
with a needle; smooth (buttery), dry (granular), or mucoid (slimy) and the
appearance as judged by the manner in which the colony refracts light;
clear, glistening, dense, opaque, or translucent.
d. Form: the shape of the colony; circular, irregular, filamentous, or rhizoid
(see Figure 1 -7)
e. Elevation: the degree to which colony growth is raised; flat, raised,
convex or umbonate (see Figure l-7)
f. Margin: the shape of the edge or margin of the colony (see Figure below)

Image 1: Different colony morphologies/characteristics
Compare your bacterial colonies to those of your bench mates. Note and record any differences in the way various bacterial species grow on agar surfaces.
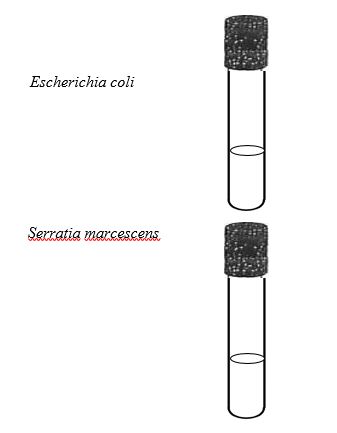
Escherichia coli:
Serratia marcescens:
D. Ubiquity of Microorganisms
Do not throw these test plates away until you have read Exercise 2, part D ("test plate isolate”).
Check to see if your "sterile control" plates remained sterile and were not contaminated. Observe, record, and DESCRIBE the numbers and varieties of different microbial colonies that appear on your test plate. Indicate the sample source (finger plate or other) or exposure method for the test plate.
"sterile control":
"test plate" and source: