
6.1: Introduction
- Page ID
- 105815
\( \newcommand{\vecs}[1]{\overset { \scriptstyle \rightharpoonup} {\mathbf{#1}} } \)
\( \newcommand{\vecd}[1]{\overset{-\!-\!\rightharpoonup}{\vphantom{a}\smash {#1}}} \)
\( \newcommand{\id}{\mathrm{id}}\) \( \newcommand{\Span}{\mathrm{span}}\)
( \newcommand{\kernel}{\mathrm{null}\,}\) \( \newcommand{\range}{\mathrm{range}\,}\)
\( \newcommand{\RealPart}{\mathrm{Re}}\) \( \newcommand{\ImaginaryPart}{\mathrm{Im}}\)
\( \newcommand{\Argument}{\mathrm{Arg}}\) \( \newcommand{\norm}[1]{\| #1 \|}\)
\( \newcommand{\inner}[2]{\langle #1, #2 \rangle}\)
\( \newcommand{\Span}{\mathrm{span}}\)
\( \newcommand{\id}{\mathrm{id}}\)
\( \newcommand{\Span}{\mathrm{span}}\)
\( \newcommand{\kernel}{\mathrm{null}\,}\)
\( \newcommand{\range}{\mathrm{range}\,}\)
\( \newcommand{\RealPart}{\mathrm{Re}}\)
\( \newcommand{\ImaginaryPart}{\mathrm{Im}}\)
\( \newcommand{\Argument}{\mathrm{Arg}}\)
\( \newcommand{\norm}[1]{\| #1 \|}\)
\( \newcommand{\inner}[2]{\langle #1, #2 \rangle}\)
\( \newcommand{\Span}{\mathrm{span}}\) \( \newcommand{\AA}{\unicode[.8,0]{x212B}}\)
\( \newcommand{\vectorA}[1]{\vec{#1}} % arrow\)
\( \newcommand{\vectorAt}[1]{\vec{\text{#1}}} % arrow\)
\( \newcommand{\vectorB}[1]{\overset { \scriptstyle \rightharpoonup} {\mathbf{#1}} } \)
\( \newcommand{\vectorC}[1]{\textbf{#1}} \)
\( \newcommand{\vectorD}[1]{\overrightarrow{#1}} \)
\( \newcommand{\vectorDt}[1]{\overrightarrow{\text{#1}}} \)
\( \newcommand{\vectE}[1]{\overset{-\!-\!\rightharpoonup}{\vphantom{a}\smash{\mathbf {#1}}}} \)
\( \newcommand{\vecs}[1]{\overset { \scriptstyle \rightharpoonup} {\mathbf{#1}} } \)
\( \newcommand{\vecd}[1]{\overset{-\!-\!\rightharpoonup}{\vphantom{a}\smash {#1}}} \)
Introduction
Cells vary in size. With few exceptions, individual cells cannot be seen with the naked eye, so scientists use microscopes (micro- = “small”; -scope = “to look at”) to study them. A microscope is an instrument that magnifies an object. Most photographs of cells are taken with a microscope; these images can also be called micrographs.
The optics of a microscope’s lenses change the orientation of the image that the user sees. A specimen that is right-side up and facing right on the microscope slide will appear upside-down and facing left when viewed through a microscope, and vice versa. Similarly, if the slide is moved left while looking through the microscope, it will appear to move right, and if moved down, it will seem to move up. This occurs because microscopes use two sets of lenses to magnify the image. Because of the manner by which light travels through the lenses, this system of two lenses produces an inverted image (binocular, or dissecting microscopes, work in a similar manner, but they include an additional magnification system that makes the final image appear to be upright).
A. Light Microscopes
To give you a sense of cell size, a typical human red blood cell is about eight millionths of a meter or eight micrometers (abbreviated as eight μm) in diameter; the head of a pin of is about two thousandths of a meter (two mm) in diameter. That means about 250 red blood cells could fit on the head of a pin.
Most student microscopes are classified as light microscopes. Visible light passes and is bent through the lens system to enable the user to see the specimen. Light microscopes are advantageous for viewing living organisms, but since individual cells are generally transparent, their components are not distinguishable unless they are colored with special stains. Staining, however, usually kills the cells.

Light microscopes, commonly used in undergraduate college laboratories, magnify up to approximately 400 times. Two parameters that are important in microscopy are magnification and resolving power. Magnification is the process of enlarging an object in appearance. Resolving power is the ability of a microscope to distinguish two adjacent structures as separate: the higher the resolution, the better the clarity and detail of the image. When oil immersion lenses are used for the study of small objects, magnification is usually increased to 1,000 times. In order to gain a better understanding of cellular structure and function, scientists typically use electron microscopes.
B. Electron Microscopes
In contrast to light microscopes, electron microscopes use a beam of electrons instead of a beam of light. Not only does this allow for higher magnification and, thus, more detail, it also provides higher resolving power. The method used to prepare the specimen for viewing with an electron microscope kills the specimen. Electrons have short wavelengths (shorter than photons) that move best in a vacuum, so living cells cannot be viewed with an electron microscope.
In a scanning electron microscope, a beam of electrons moves back and forth across a cell’s surface, creating details of cell surface characteristics. In a transmission electron microscope, the electron beam penetrates the cell and provides details of a cell’s internal structures. As you might imagine, electron microscopes are significantly more bulky and expensive than light microscopes.
C. Staining
Staining is a technique used in microscopy to enhance contrast in a microscopic image. Stains and dyes are frequently used to highlight structures in microbes for viewing, often with the aid of different microscopes. Stains may be used to define and examine different types of microbes, various stages of cellular life (e.g., the mitotic cycle), and even organelles within individual cells (e.g., mitochondria or chloroplasts).
In-vivo staining is the process of dyeing living tissue — in vivo means “in life” (as contrasted to in-vitro staining). When a certain cell or structure takes on contrasting color(s), its form (morphology) or position within a cell or tissue can be readily seen and studied. The usual purpose is to reveal cytological details that might otherwise not be apparent; however, staining can also reveal where certain chemicals or specific chemical reactions are taking place within cells. In-vitro staining involves coloring cells or structures that have been removed from their biological context. Certain stains are often combined to reveal more details and features than a single stain could reveal alone, and a counterstain is a stain that increases visibility of cells or structures when the principal stain is not sufficient. Scientists and physicians can combine staining with specific protocols for fixation and sample preparation and can use these standard techniques as consistent, repeatable diagnostic tools.
There are an incredible number of stains that can be used in a variety of different methods. What follows here are some common aspects of the process of preparing for in-vitro staining.
- Fixation: This can itself consist of several steps. Fixation aims to preserve the shape of the cells (in this case, microbes) as much as possible. Sometimes heat fixation is used to kill, adhere, and alter the cells so they will accept stains. Most chemical fixatives generate chemical bonds between proteins and other substances within the sample, increasing their rigidity. Common fixatives include formaldehyde, ethanol, methanol, and picric acid.
- Permeabilization: This involves treatment of the cells with (usually) a mild surfactant. This treatment dissolves cell membranes, allowing larger dye molecules to enter the cell’s interior.
- Mounting: This step usually involves attaching the samples to a glass microscope slide for observation and analysis. In some cases, cells may be grown directly on a slide. For samples of loose cells the sample can be directly applied to a slide.
At its simplest, the actual staining process may involve immersing the sample (before or after fixation and mounting) in dye solution, followed by rinsing and observation. Many dyes, however, require the use of a mordant — a chemical compound that reacts with the stain to form an insoluble colored precipitate. When the excess dye solution is washed away, the mordanted stain remains. There is an incredible array of stains that can be used at this step, from those that stain specific microbial types (see the figure below) to those that highlight sub-compartments or organelles of a cell, such as the nucleus or endoplasmic reticulum. Alternatively, negative staining can be employed. This is a simple staining method for bacteria, performed by smearing the cells onto the slide and then applying nigrosin (a black synthetic dye) or Indian ink (an aqueous suspension of carbon particles). After drying, the microorganisms may be viewed in bright field microscopy as lighter inclusions contrast well against the dark environment surrounding them

Live, in-vivo staining microscopy shares many of these steps, with the exception of fixation, which invariably kills the microbe to be examined.
D. Dark-Field Microscopy
Dark-field microscopy is ideally used to illuminate unstained samples causing them to appear brightly lit against a dark background. This type of microscope contains a special condenser that scatters light and causes it to reflect off the specimen at an angle. Rather than illuminating the sample with a filled cone of light, the condenser is designed to form a hollow cone of light. The light at the apex of the cone is focused at the plane of the specimen; as this light moves past the specimen plane it spreads again into a hollow cone. The objective lens sits in the dark hollow of this cone; although the light travels around and past the objective lens, no rays enter it.
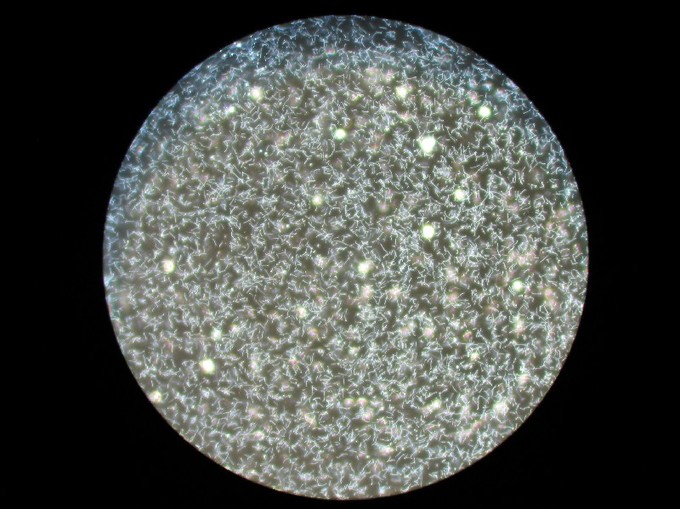
The entire field appears dark when there is no sample on the microscope stage; thus the name dark-field microscopy. When a sample is on the stage, the light at the apex of the cone strikes it. The rays scattered by the sample and captured in the objective lens thus make the image.
Samples observed under dark-field microscopy should be carefully prepared since dust and other particles also scatter the light and are easily detected. Glass slides need to be thoroughly cleaned of extraneous dust and dirt. It may be necessary to filter sample media (agar, water, saline) to exclude confusing contaminants. Sample materials need to be spread thinly; too much material on the slide creates many overlapping layers and edges, making it difficult to interpret structures.
Dark-field microscopy has many applications in microbiology. It allows the visualization of live bacteria, and distinguishes some structure (rods, curved rods, spirals, or cocci) and movement.
E. Phase-Contrast Microscopy
Phase-contrast microscopy visualizes differences in the refractive indexes of different parts of a specimen relative to unaltered light.
Phase-contrast microscopy is a method of manipulating light paths through the use of strategically placed rings in order to illuminate transparent objects. Dutch physicist Fritz Zernike developed the technique in the 1930s; for his efforts he was awarded the Nobel Prize in 1953.

In phase-contrast microscopy, parallel beams of light are passed through objects of different densities. The microscope contains special condensers that throw light “out of phase” causing it to pass through the object at different speeds. Internal details and organelles of live, unstained organisms (e.g. mitochondria, lysosomes, and the Golgi body) can be seen clearly with this microscope.
A phase ring in condenser allows a cylinder of light to pass through it while still in phase. Unaltered light hits the phase ring in the lens and is excluded. Light that is slightly altered by passing through a different refractive index is allowed to pass through. Light passing through cellular structures, such as chromosomes or mitochondria is retarded because they have a higher refractive index than the surrounding medium. Elements of lower refractive index advance the wave. Much of the background light is removed and light that constructively or destructively interfered is let through with enhanced contrast.
Phase-contrast microscopy allows the visualization of living cells in their natural state with high contrast and high resolution. This tool works best with a thin specimen and is not ideal for a thick specimen. Phase-contrast images have a characteristic grey background with light and dark features found across the sample. One disadvantage of phase-contrast microscopy is halo formation called halo-light ring.
F. Key Points
- Light microscopes allow for magnification of an object approximately up to 400-1000 times depending on whether the high power or oil immersion objective is used.
- Light microscopes use visible light which passes and bends through the lens system.
- Electron microscopes use a beam of electrons, opposed to visible light, for magnification.
- Electron microscopes allow for higher magnification in comparison to a light microscope thus, allowing for visualization of cell internal structures.
- In-vivo staining, which visualizes cells that are alive, and in-vitro staining, which visualizes fixed cells, both have important uses.
- There is a vast array of stains that can be used on microbes that can highlight almost any characteristic of a cell, even organelles within a cell.
- Staining protocols can be complex, but they share some basic steps: preparation, fixation, staining, and mounting.
- In dark-field microscopy, the light reaches the specimen from an angle with the help of an opaque disk.
- The specimen appears lit up against a dark background.
- Dark-field microscopy is most useful for extremely small living organisms that are invisible in the light microscope.
- A phase-contrast microscope splits a beam of light into 2 types of light, direct and refracted (reflected) and brings them together to form an image of the specimen.
- Where the lights are “in-phase” the image is brighter, where the lights are “out of phase” the image is darker, and by amplifying these differences in the light, it enhances contrast.
- Phase-contrast microscopy allows for the detailed observation of living organisms, especially the internal structures.
G. Key Terms
- resolution: The degree of fineness with which an image can be recorded or produced, often expressed as the number of pixels per unit of length (typically an inch).
- electron: The subatomic particle having a negative charge and orbiting the nucleus; the flow of electrons in a conductor constitutes electricity.
- surfactant: a surface active agent, or wetting agent, capable of reducing the surface tension of a liquid; typically organic compounds having a hydrophilic “head” and a hydrophobic “tail”
- organelle: a specialized structure found inside cells that carries out a specific life process (e.g., ribosomes, vacuoles)
- condenser: A lens (or combination of lenses) designed to gather light and focus it onto a specimen or part of a mechanism.
- refractive index: the ratio of the speed of light in air or vacuum to that in another medium.
LICENSES AND ATTRIBUTIONS
CC LICENSED CONTENT, SPECIFIC ATTRIBUTION
- OpenStax College, Biology. October 16, 2013. Provided by: OpenStax CNX. Located at: http://cnx.org/content/m44405/latest...ol11448/latest. License: CC BY: Attribution
- electron. Provided by: Wiktionary. Located at: en.wiktionary.org/wiki/electron. License: CC BY-SA: Attribution-ShareAlike
- resolution. Provided by: Wiktionary. Located at: en.wiktionary.org/wiki/resolution. License: CC BY-SA: Attribution-ShareAlike
- OpenStax College, Studying Cells. October 16, 2013. Provided by: OpenStax CNX. Located at: http://cnx.org/content/m44405/latest...1_01ab_new.jpg. License: CC BY: Attribution
- Staining. Provided by: Wikipedia. Located at: en.Wikipedia.org/wiki/Staining. License: CC BY-SA: Attribution-ShareAlike
- Staining. Provided by: Wikipedia. Located at: en.Wikipedia.org/wiki/Staining. License: CC BY-SA: Attribution-ShareAlike
- Staining. Provided by: Wikipedia. Located at: en.Wikipedia.org/wiki/Staining. License: CC BY-SA: Attribution-ShareAlike
- organelle. Provided by: Wiktionary. Located at: en.wiktionary.org/wiki/organelle. License: CC BY-SA: Attribution-ShareAlike
- surfactant. Provided by: Wiktionary. Located at: en.wiktionary.org/wiki/surfactant. License: CC BY-SA: Attribution-ShareAlike
- OpenStax College, Studying Cells. October 16, 2013. Provided by: OpenStax CNX. Located at: http://cnx.org/content/m44405/latest...1_01ab_new.jpg. License: CC BY: Attribution
- Chlamydia Geimsa Stain CDC. Provided by: Wikimedia. Located at: commons.wikimedia.org/wiki/Fi..._Stain_CDC.jpg. License: Public Domain: No Known Copyright