
4: Colony and Cell Morphology; Simple Stains
- Page ID
- 110764
By the end of this laboratory period you will be able to:
- Differentiate between colony morphology and cell morphology, and describe the colony morphology of bacteria grown on a solid surface
- Prepare a bacterial smear for staining
- Perform a simple stain, and explain why they are useful
- Visualize individual bacterial cells using oil immersion microscopy and describe their cell morphology
Introduction
Colony morphology
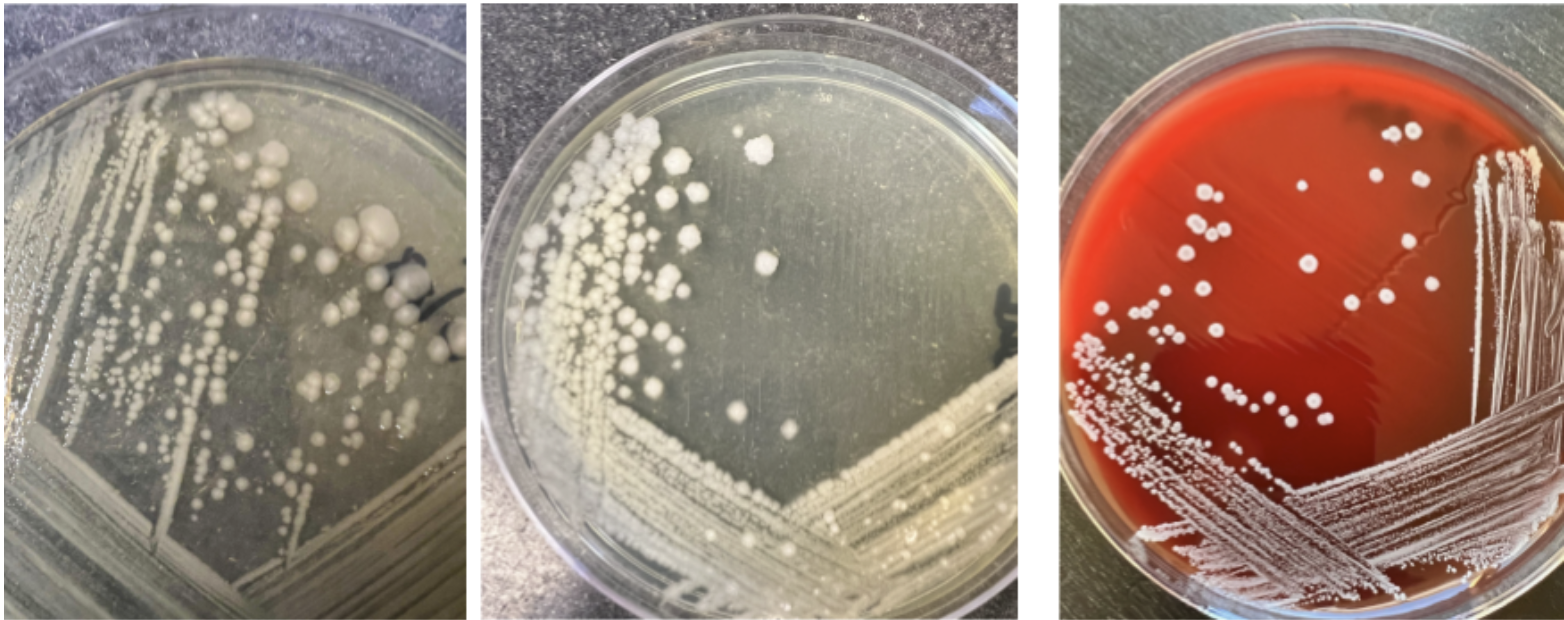
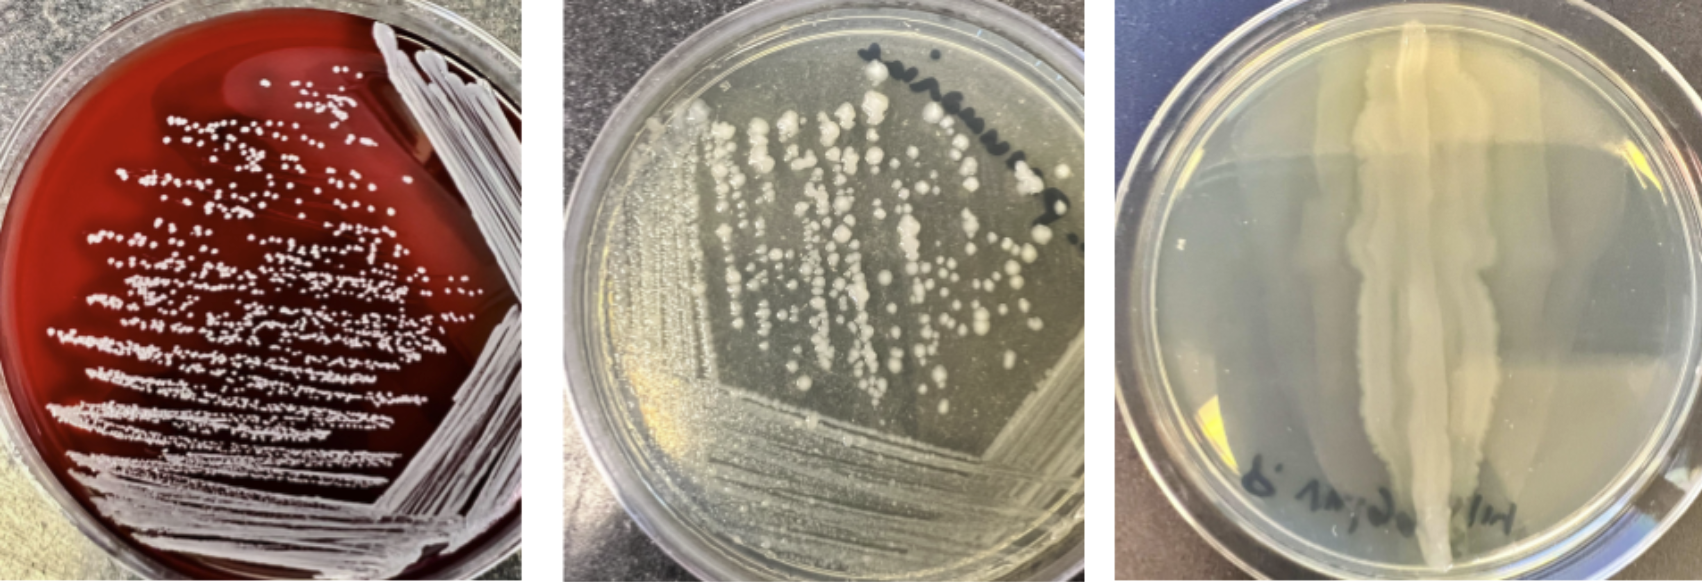
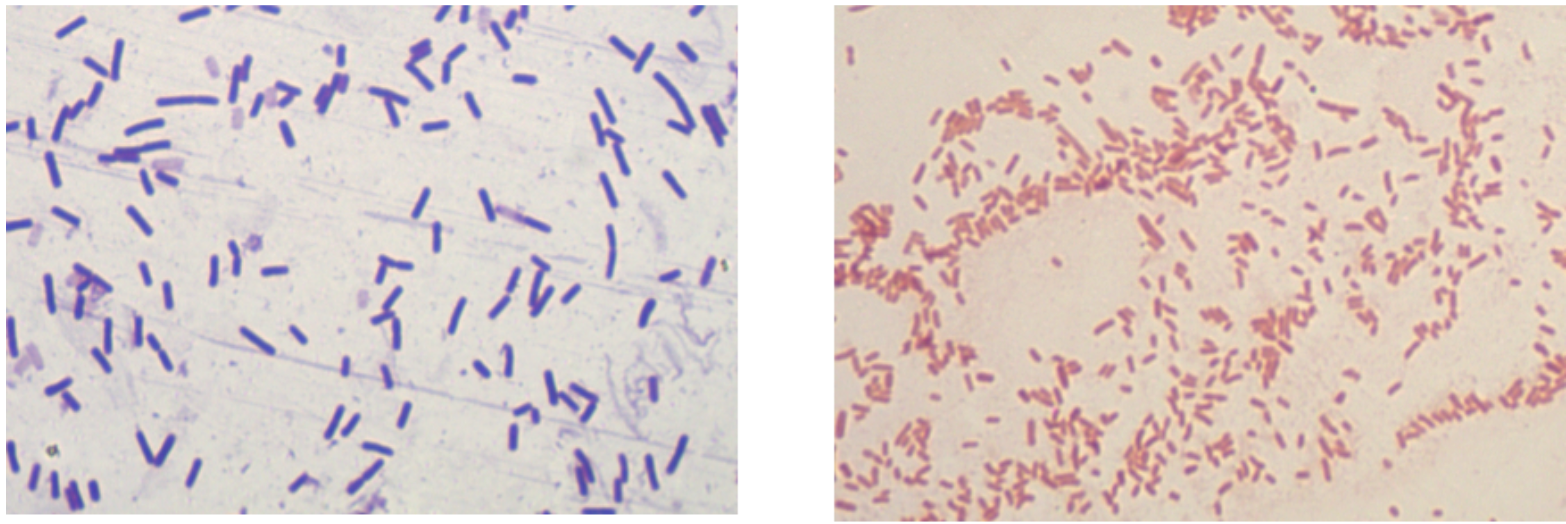
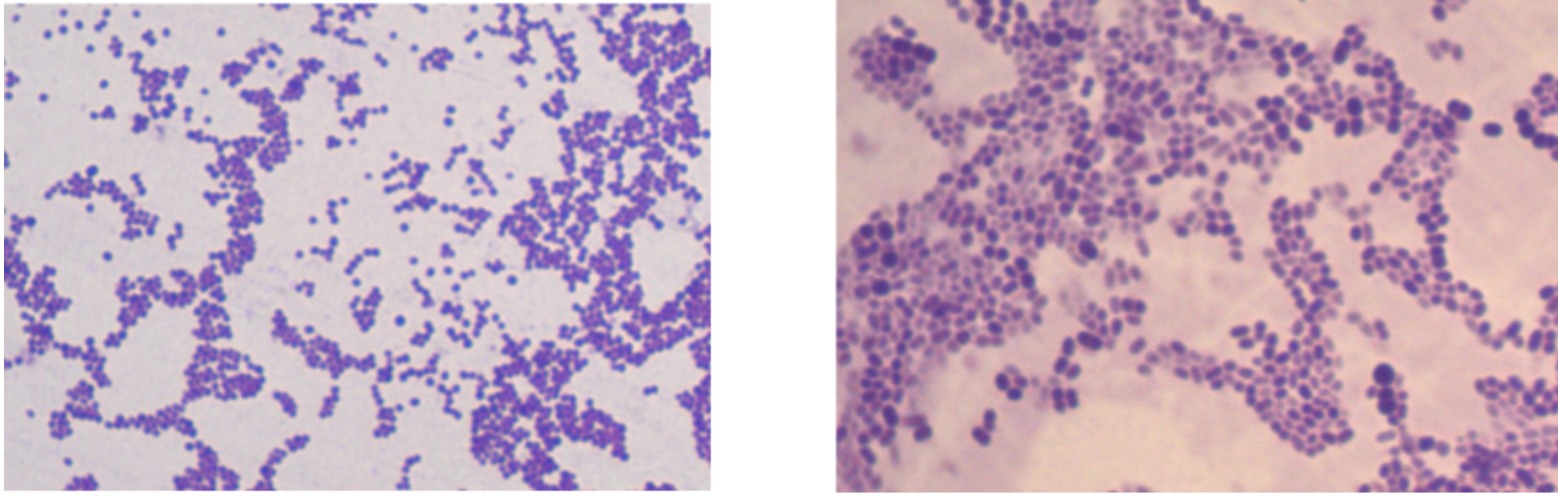
On a solid surface, a single bacterium can grow into millions very quickly as they divide. Many of the common organisms we use in the microbiology lab can be seen on a nutrient agar plate within 24 hours of inoculation. When a single bacterium is placed on the surface of solid media, it will divide and divide and divide until there are millions of that specific bacteria - enough that you can see them. We call these “colonies” of bacteria. Depending on the species, the colonies can look really different from each other - this is referred to as “colony morphology”.
There is some subjectivity to assigning descriptions to colonies - and bacteria can look very different depending on factors such as the type of media used and the temperature organisms are grown at! The best way to view colonies is to remove the lid and hold the plate at an angle to allow the light to catch the colony surface. A magnifying glass can also help visualize colony characteristics. Here are some examples of common organisms that you will see in the microbiology lab (Figure \(\PageIndex{2}\))
Cell Morphology
To view individual bacterial cells, you will need to use a microscope. Bacteria are so small that they test the limit of resolution in our light microscope. The best way to view most bacteria is using oil immersion microscopy, which you will learn to do in today’s lab.
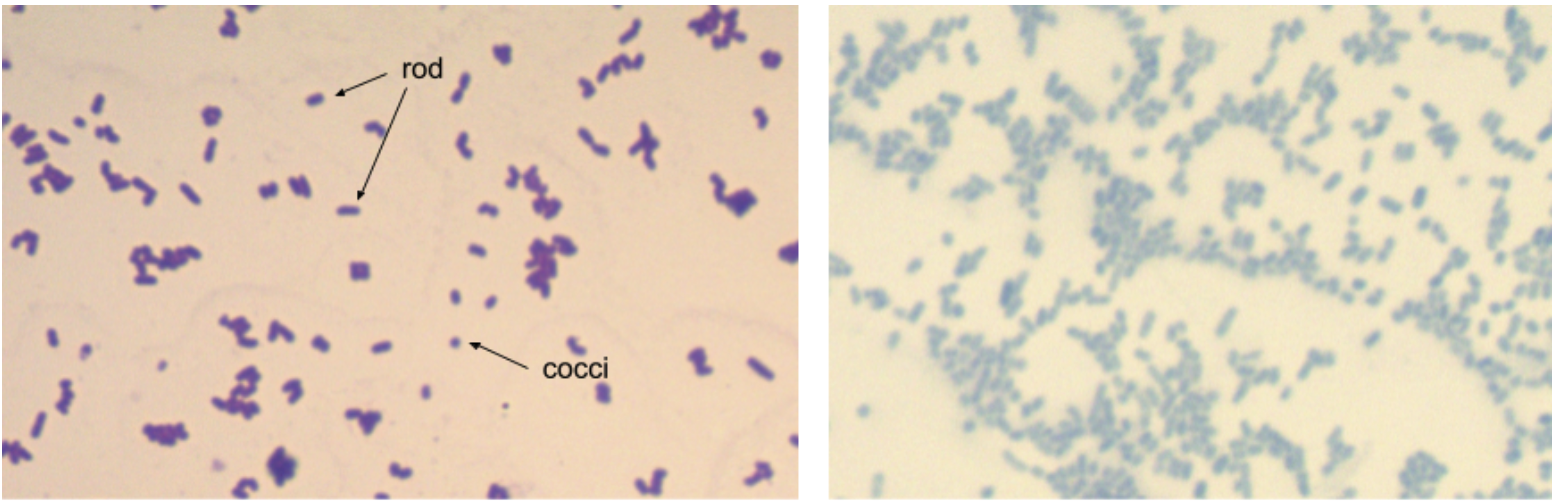
Despite the tremendous genetic diversity seen in prokaryotes, cell morphology falls into just a few categories. Bacterial cells form cocci (round), bacillus (rod), and curved structures. Detailed diagrams and descriptions of bacterial cell morphology can be found in OpenStax Microbiology, Chapter 3.3, so we will not go over that in detail here. However, it’s good to be familiar with some common shapes and arrangements seen in our laboratory (and ones you are likely to see in today’s lab!).
Preparation of a Bacterial Smear
In order to view bacteria under a microscope, you first need to get them onto a microscope slide and heat-fix them to kill them and help them adhere to the slide.
Procedure
- Make a circle using a sharpie around the colony from which you will be taking bacteria for your smear (Figure \(\PageIndex{4}\))
- Label the edge of a clean microscope slide with the name of the specimen.
- Add a drop of water to the slide. Be sure to keep track of which side of the slide you are making your smear! This will be important when you go to view the slide under the microscope. Note: many staining procedures use decolorizers with alcohol which will remove the writing on the slide made with a sharpie (Figure \(\PageIndex{5}\)).
- Using an inoculation loop or needle, gather a very small amount of bacteria from the colony. Be sure to use aseptic technique when collecting the specimen.
- Use the needle or loop to deposit the bacteria onto the slide in the water droplet. Agitate the loop to get an even distribution of bacteria within the water drop (Figure \(\PageIndex{6}\)).
- Place the slide on a hot plate. This will allow the water to evaporate and simultaneously heat-fix the smear. You can also do this by passing the smear over a Bunsen burner flame (carefully!).
- When the slide is dry you should see a slightly opaque film on the surface of the slide. This slide is ready to be stained (Figure \(\PageIndex{7}\)).
Simple Stains
It is nearly impossible to see the bacteria in your smear without some kind of stain. Bacteria are so tiny and unstained that they are nearly transparent when viewed with a light microscope.! The simplest kind of stain uses one type of colored dye that will bind to the surface of the bacteria cells and allow them to be visualized under the microscope. Some of the most common dyes used for simple stains include crystal violet, safranin, and methylene blue. All are “basic” dyes that are positively charged and will adhere to the negatively charged surface of the bacterial cell.
Procedure
- Immerse the smear into the staining reservoir for approximately 1 minute.
- Rinse the surface of the stained smear with water to remove any excess stain
- Blot dry
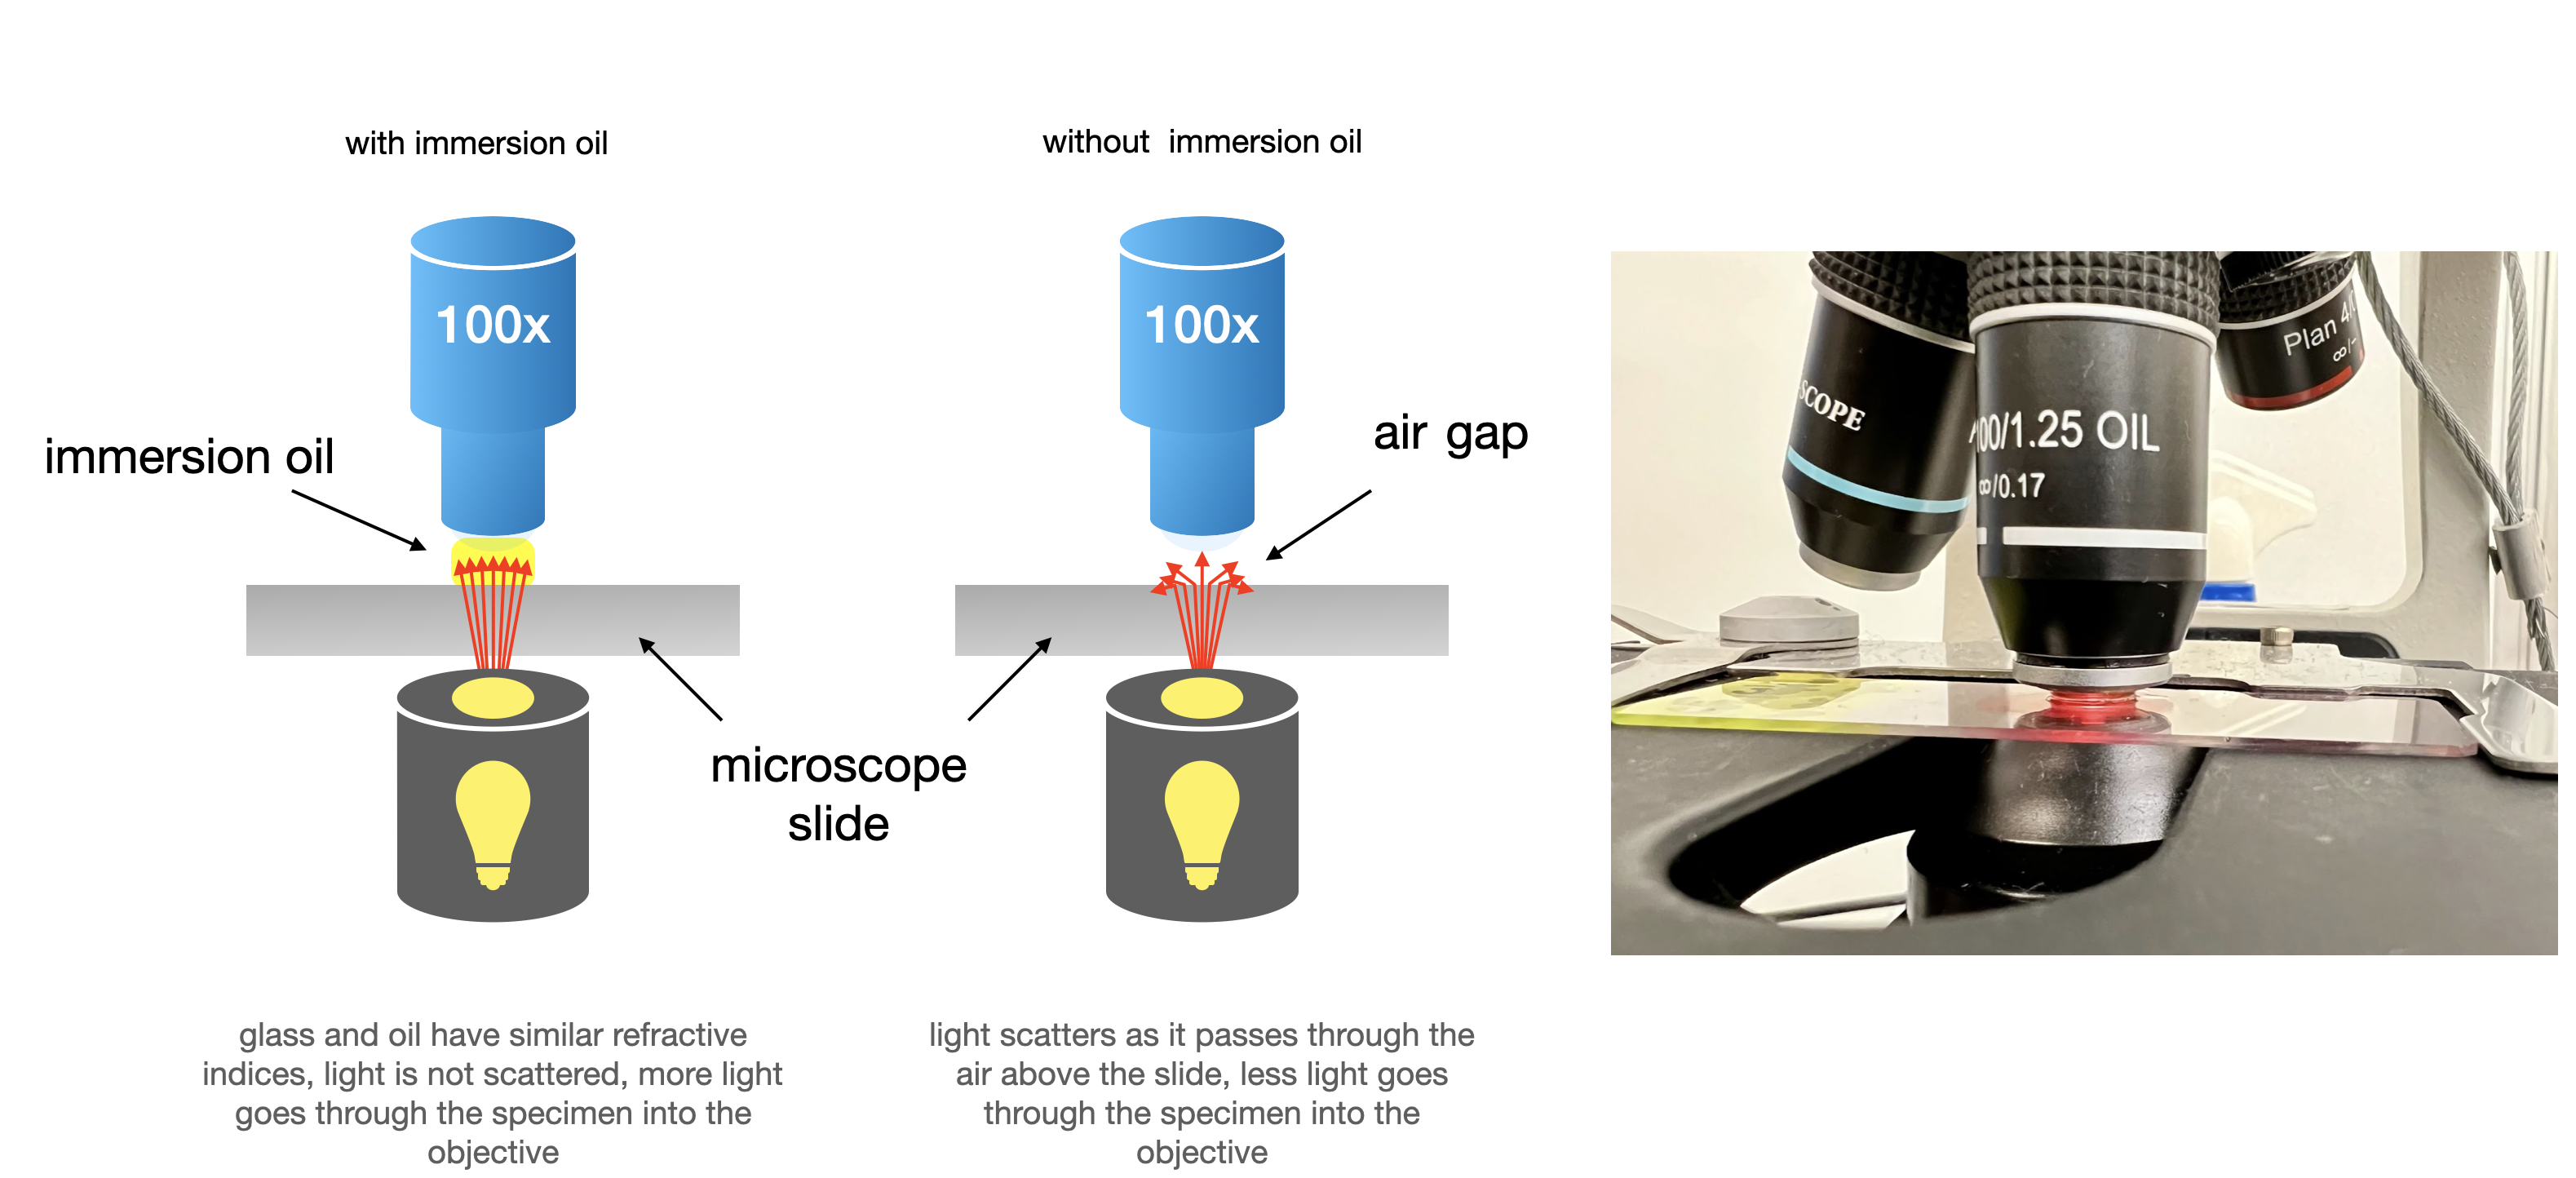
- The principles of oil immersion microscopy are shown in Figure \(\PageIndex{4}\) below.
Oil Immersion Microscopy
When you use the 4x, 10x, and 40x microscope objectives, light passes through the underside of the slide and reaches an air gap before it goes into the objective lens. This means that less light is getting into the objective lens, and this reduces the resolution of the image. When we reach the 100x objective, this loss of resolution significantly impacts our ability to view the specimen. This is resolved by placing a thin layer of oil between the microscope slide and the objective lens. The refractive index of the oil is similar to that of the glass slide and objective lenses, and results in more light making it through the objective and ultimately to the eyepiece.
Procedure
- Set up the microscope as you normally would, bringing the smear into focus at 4x using the coarse focus knob. Bacterial smears do not have coverslips! Using the 4x objective, scan your smear looking for a place where the smear is thin, but there is also light coming through patches of cells. You are looking for a place on the slide where the cells are in a single layer and there is space in between them.
- Rotate the revolving nosepiece bringing the 10x objective into place. Use the fine focus to re-focus the image as needed and re-center the slide or adjust position further to find a nice thin part of the smear where the cells are in a monolayer.
- Rotate the revolving nosepiece bringing the 40 x objective into place. Use the fine focus to re-focus the image as needed and re-center the slide or adjust position further to find a nice thin part of the smear where the cells are in a monolayer.
- Rotate the revolving nosepiece so that the specimen is between the 40x and 100x objectives. Place a drop of immersion oil right on top of the slide above where the light is passing through.
- Complete the rotation so that the 100x objective is in position. There should be no air between the specimen and the objective lens. DO NOT rotate the 40x objective into the oil by accident!
- When you are done photographing or drawing what you see, use lens paper to remove all oil from the 100x objective. Discard that lens paper and when you are ready to put your microscope back, use a fresh piece of lens paper to clean the objectives starting at 4x, then 10x, then 40x, and finally clean the 100x one more time. Have your instructor check your microscope before putting it away.
Materials
Per Student Group
- Magnifying glass and colony counter
- Metric ruler
- Environmental plates from Lab 3
- Clean glass microscope slides
- Methylene blue stain
- Safranin stain
- Crystal violet stain
- Disposable gloves
- Squirt bottle with water
- Clothespins as slide holders
- Compound microscope with oil-immersion lens
- Immersion oil
- Lens paper
-
Experiment
- Use the terms in Figure \(\PageIndex{1}\) and in the text, to describe some representative colonies on your environmental plates. Measure colony diameters (in mm) with a ruler and include them with your descriptions in the table on the datasheet or lab notebook.
- Follow the procedural diagram in Figure \(\PageIndex{34}\) to prepare smears of two different organisms on a slide. Be sure not to mix them. Make a second slide with the remaining two organisms at the same time so they can be air-drying simultaneously. Emulsions should be about the size of a dime.
- Heat-fix each slide as described in Figure \(\PageIndex{34}\). Grasp the slide with a slide holder and pass the smears through the upper part of a flame at least 2-3 times. Avoid overheating the slide.
- Place the slide on the metal stain rack over the sink. Cover the smears with the stain using the following times:
- Crystal violet: stain for 30 to 60 seconds
- Safranin: stain for up to 1 minute
- Methylene blue: stain for 30 to 60 seconds
- Grasp the slide with a slide holder and hold it at an angle. Gently rinse the slide with
- distilled water. Aim the water bottle above the smears, let the water run down the smears, and rinse. Squirting water directly on the smears will risk losing the bacteria on the slide.
- Gently blot dry in a tablet of bibulous paper. Do not rub.
- Observe the slide using the oil-immersion lens. Record your observations of cell morphology and arrangement in the datasheet.
- Draw your environmental plates and your lab partner’s plates. Choose at least 3 species of microbes that you find most interesting, and describe the colony morphology of these species.
Data
Colony morphology table
|
Organism |
1 |
2 |
3 |
|---|---|---|---|
|
Form |
|||
|
Elevation |
|||
|
Margin |
|||
|
Pigmentation |
|||
|
Texture |
|||
|
Diameter (mm) |
|||
|
Bacterium or fungus? |
|||
|
Sketch or photograph |
Cell morphology table:
|
Organism |
1 |
2 |
3 |
|---|---|---|---|
|
Cell shape |
|||
|
Arrangement |
|||
|
Basic dye used |
|||
|
Bacterium or fungus? |
|||
|
Sketch or photograph |
Questions
- From your environmental plate, which environment sample contains the most diverse microorganisms? Why do you think this is the case?
- From the body part plate, do you see the same bacteria from the two parts of your body that you sampled? How can you tell? And why do you think this is the case?
- Why are basic dyes more effective for bacterial staining than acidic dyes?
- Are your bacterial smears thin enough for you to see individual bacterial or fungal cells and their arrangements? If not, what can you do to improve your smear preparation technique?