1.3: Units of Measure
- Page ID
- 24729
\( \newcommand{\vecs}[1]{\overset { \scriptstyle \rightharpoonup} {\mathbf{#1}} } \)
\( \newcommand{\vecd}[1]{\overset{-\!-\!\rightharpoonup}{\vphantom{a}\smash {#1}}} \)
\( \newcommand{\dsum}{\displaystyle\sum\limits} \)
\( \newcommand{\dint}{\displaystyle\int\limits} \)
\( \newcommand{\dlim}{\displaystyle\lim\limits} \)
\( \newcommand{\id}{\mathrm{id}}\) \( \newcommand{\Span}{\mathrm{span}}\)
( \newcommand{\kernel}{\mathrm{null}\,}\) \( \newcommand{\range}{\mathrm{range}\,}\)
\( \newcommand{\RealPart}{\mathrm{Re}}\) \( \newcommand{\ImaginaryPart}{\mathrm{Im}}\)
\( \newcommand{\Argument}{\mathrm{Arg}}\) \( \newcommand{\norm}[1]{\| #1 \|}\)
\( \newcommand{\inner}[2]{\langle #1, #2 \rangle}\)
\( \newcommand{\Span}{\mathrm{span}}\)
\( \newcommand{\id}{\mathrm{id}}\)
\( \newcommand{\Span}{\mathrm{span}}\)
\( \newcommand{\kernel}{\mathrm{null}\,}\)
\( \newcommand{\range}{\mathrm{range}\,}\)
\( \newcommand{\RealPart}{\mathrm{Re}}\)
\( \newcommand{\ImaginaryPart}{\mathrm{Im}}\)
\( \newcommand{\Argument}{\mathrm{Arg}}\)
\( \newcommand{\norm}[1]{\| #1 \|}\)
\( \newcommand{\inner}[2]{\langle #1, #2 \rangle}\)
\( \newcommand{\Span}{\mathrm{span}}\) \( \newcommand{\AA}{\unicode[.8,0]{x212B}}\)
\( \newcommand{\vectorA}[1]{\vec{#1}} % arrow\)
\( \newcommand{\vectorAt}[1]{\vec{\text{#1}}} % arrow\)
\( \newcommand{\vectorB}[1]{\overset { \scriptstyle \rightharpoonup} {\mathbf{#1}} } \)
\( \newcommand{\vectorC}[1]{\textbf{#1}} \)
\( \newcommand{\vectorD}[1]{\overrightarrow{#1}} \)
\( \newcommand{\vectorDt}[1]{\overrightarrow{\text{#1}}} \)
\( \newcommand{\vectE}[1]{\overset{-\!-\!\rightharpoonup}{\vphantom{a}\smash{\mathbf {#1}}}} \)
\( \newcommand{\vecs}[1]{\overset { \scriptstyle \rightharpoonup} {\mathbf{#1}} } \)
\(\newcommand{\longvect}{\overrightarrow}\)
\( \newcommand{\vecd}[1]{\overset{-\!-\!\rightharpoonup}{\vphantom{a}\smash {#1}}} \)
\(\newcommand{\avec}{\mathbf a}\) \(\newcommand{\bvec}{\mathbf b}\) \(\newcommand{\cvec}{\mathbf c}\) \(\newcommand{\dvec}{\mathbf d}\) \(\newcommand{\dtil}{\widetilde{\mathbf d}}\) \(\newcommand{\evec}{\mathbf e}\) \(\newcommand{\fvec}{\mathbf f}\) \(\newcommand{\nvec}{\mathbf n}\) \(\newcommand{\pvec}{\mathbf p}\) \(\newcommand{\qvec}{\mathbf q}\) \(\newcommand{\svec}{\mathbf s}\) \(\newcommand{\tvec}{\mathbf t}\) \(\newcommand{\uvec}{\mathbf u}\) \(\newcommand{\vvec}{\mathbf v}\) \(\newcommand{\wvec}{\mathbf w}\) \(\newcommand{\xvec}{\mathbf x}\) \(\newcommand{\yvec}{\mathbf y}\) \(\newcommand{\zvec}{\mathbf z}\) \(\newcommand{\rvec}{\mathbf r}\) \(\newcommand{\mvec}{\mathbf m}\) \(\newcommand{\zerovec}{\mathbf 0}\) \(\newcommand{\onevec}{\mathbf 1}\) \(\newcommand{\real}{\mathbb R}\) \(\newcommand{\twovec}[2]{\left[\begin{array}{r}#1 \\ #2 \end{array}\right]}\) \(\newcommand{\ctwovec}[2]{\left[\begin{array}{c}#1 \\ #2 \end{array}\right]}\) \(\newcommand{\threevec}[3]{\left[\begin{array}{r}#1 \\ #2 \\ #3 \end{array}\right]}\) \(\newcommand{\cthreevec}[3]{\left[\begin{array}{c}#1 \\ #2 \\ #3 \end{array}\right]}\) \(\newcommand{\fourvec}[4]{\left[\begin{array}{r}#1 \\ #2 \\ #3 \\ #4 \end{array}\right]}\) \(\newcommand{\cfourvec}[4]{\left[\begin{array}{c}#1 \\ #2 \\ #3 \\ #4 \end{array}\right]}\) \(\newcommand{\fivevec}[5]{\left[\begin{array}{r}#1 \\ #2 \\ #3 \\ #4 \\ #5 \\ \end{array}\right]}\) \(\newcommand{\cfivevec}[5]{\left[\begin{array}{c}#1 \\ #2 \\ #3 \\ #4 \\ #5 \\ \end{array}\right]}\) \(\newcommand{\mattwo}[4]{\left[\begin{array}{rr}#1 \amp #2 \\ #3 \amp #4 \\ \end{array}\right]}\) \(\newcommand{\laspan}[1]{\text{Span}\{#1\}}\) \(\newcommand{\bcal}{\cal B}\) \(\newcommand{\ccal}{\cal C}\) \(\newcommand{\scal}{\cal S}\) \(\newcommand{\wcal}{\cal W}\) \(\newcommand{\ecal}{\cal E}\) \(\newcommand{\coords}[2]{\left\{#1\right\}_{#2}}\) \(\newcommand{\gray}[1]{\color{gray}{#1}}\) \(\newcommand{\lgray}[1]{\color{lightgray}{#1}}\) \(\newcommand{\rank}{\operatorname{rank}}\) \(\newcommand{\row}{\text{Row}}\) \(\newcommand{\col}{\text{Col}}\) \(\renewcommand{\row}{\text{Row}}\) \(\newcommand{\nul}{\text{Nul}}\) \(\newcommand{\var}{\text{Var}}\) \(\newcommand{\corr}{\text{corr}}\) \(\newcommand{\len}[1]{\left|#1\right|}\) \(\newcommand{\bbar}{\overline{\bvec}}\) \(\newcommand{\bhat}{\widehat{\bvec}}\) \(\newcommand{\bperp}{\bvec^\perp}\) \(\newcommand{\xhat}{\widehat{\xvec}}\) \(\newcommand{\vhat}{\widehat{\vvec}}\) \(\newcommand{\uhat}{\widehat{\uvec}}\) \(\newcommand{\what}{\widehat{\wvec}}\) \(\newcommand{\Sighat}{\widehat{\Sigma}}\) \(\newcommand{\lt}{<}\) \(\newcommand{\gt}{>}\) \(\newcommand{\amp}{&}\) \(\definecolor{fillinmathshade}{gray}{0.9}\)The Metric System
The metric system is an internationally agreed-upon measurement system based on decimals or powers of 10. Scientists use a refined version called the International System of Units (abbreviated SI). In biology, you will often find a need to describe measurements of length, volume, mass, time, temperature or amount of substance.
International System of Units
Metric Units
- length: meter (m)
- volume: liter (L)
- mass: gram (g)
- time: second (s)
- temperature: Celsius (°C)
- Kelvin (K) is a unit of thermodynamic temperature and is the SI unit. The Kelvin scale in the same as the Celsius or centigrade scale but offset by 273.16
- Biology uses Celsius predominantly because of the range in which organisms live.
- amount of substance: mole (mol)
- A mole is a number representing 6.022×10²³ of something
- Just as a pair of shoes equals 2 shoes, a mole of shoes is 6.022×10²³ shoes
- Just as a dozen eggs equals 12 eggs, a mole of eggs is 6.022×10²³ eggs
Strategy for Conversions
- What unit is being asked for?
- 500ml = ____L → liters
- What unit are you starting from?
- 500ml = ____L → milliliters
- Which unit is larger? By how much is that unit larger?
- Liters are the larger unit. Liters are 1,000X (103) greater than milliliters.
- Which direction are we moving?
- Since we are moving to a larger unit, our value will be smaller. In this case, the value is smaller by 1,000X
- In other words, the value is 1/1000 or 0.001 the value.
- So what is the answer?
Factoring Out
Using the idea of factors of ten, you can assess the difference between the two units and cancel out the original unit algebraically to reach the desired final unit.
- 500ml=_____L
or,
- which states 1000 milliliter in every 1 liter
- pay attention to the units and how we’ve canceled out the ml in the numerator of 500ml and in the denominator in the conversion of 1L in 1000ml
Additional Resources
Accuracy and Precision
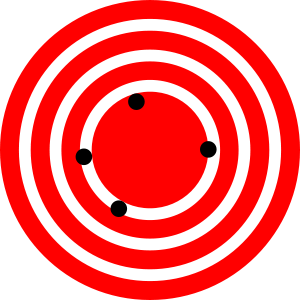
Accuracy refers to how closely a measured value agrees with the correct or target value.
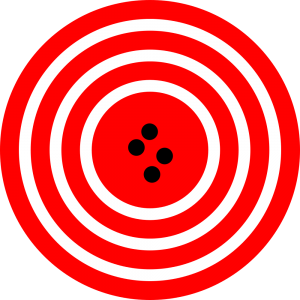
Precision refers to how closely individual measurements agree with each other and reflects the repeatability in those measurements.

This illustrates accuracy. Measurements are on target.

This illustrates precision. Measurements are very close to each other and repeatable.

This illustrates Accuracy AND Precision. Each measurement is on target and also highly repeatable.
Instruments have a finite amount of accuracy and it is important to report measurements within that level of accuracy. Significant figures, report the number of digits that are known to some degree of confidence with the measuring device. With the increased sensitivity of the equipment, the number of significant figures increases.
Pipetting Basics
Types of Micropipettors
Pipettors are made by many different manufacturers and thus all do not look the same. Learning to correctly use one type of pipettor will provide you the knowledge to use others as they share the same method of distributing small volumes. This lab will illustrate the Rainin Pipetman® micropipettors.
The top of the plunger shows the pipettor size for the Pipetman models. Each pipettor has its own volume range and it is CRITICAL to use a pipettor only in its proper volume range. The “P-number” represents the maximum volume in μL that the pipettor can measure. Pipettors are more accurate in the upper part of their range. 20 μL should be measured with a P20 rather than with a P200. The four pipettor sizes (P10, P20, P200, P1000) used in our lab will measure from 1 μL – 1000 μL as shown below.
Correctly Adjusting the Pipettors
Gilson Pipetman pipetting ranges chart. Note that the P200 officially has a range from 50-200μl
Tutorial on Proper Usage

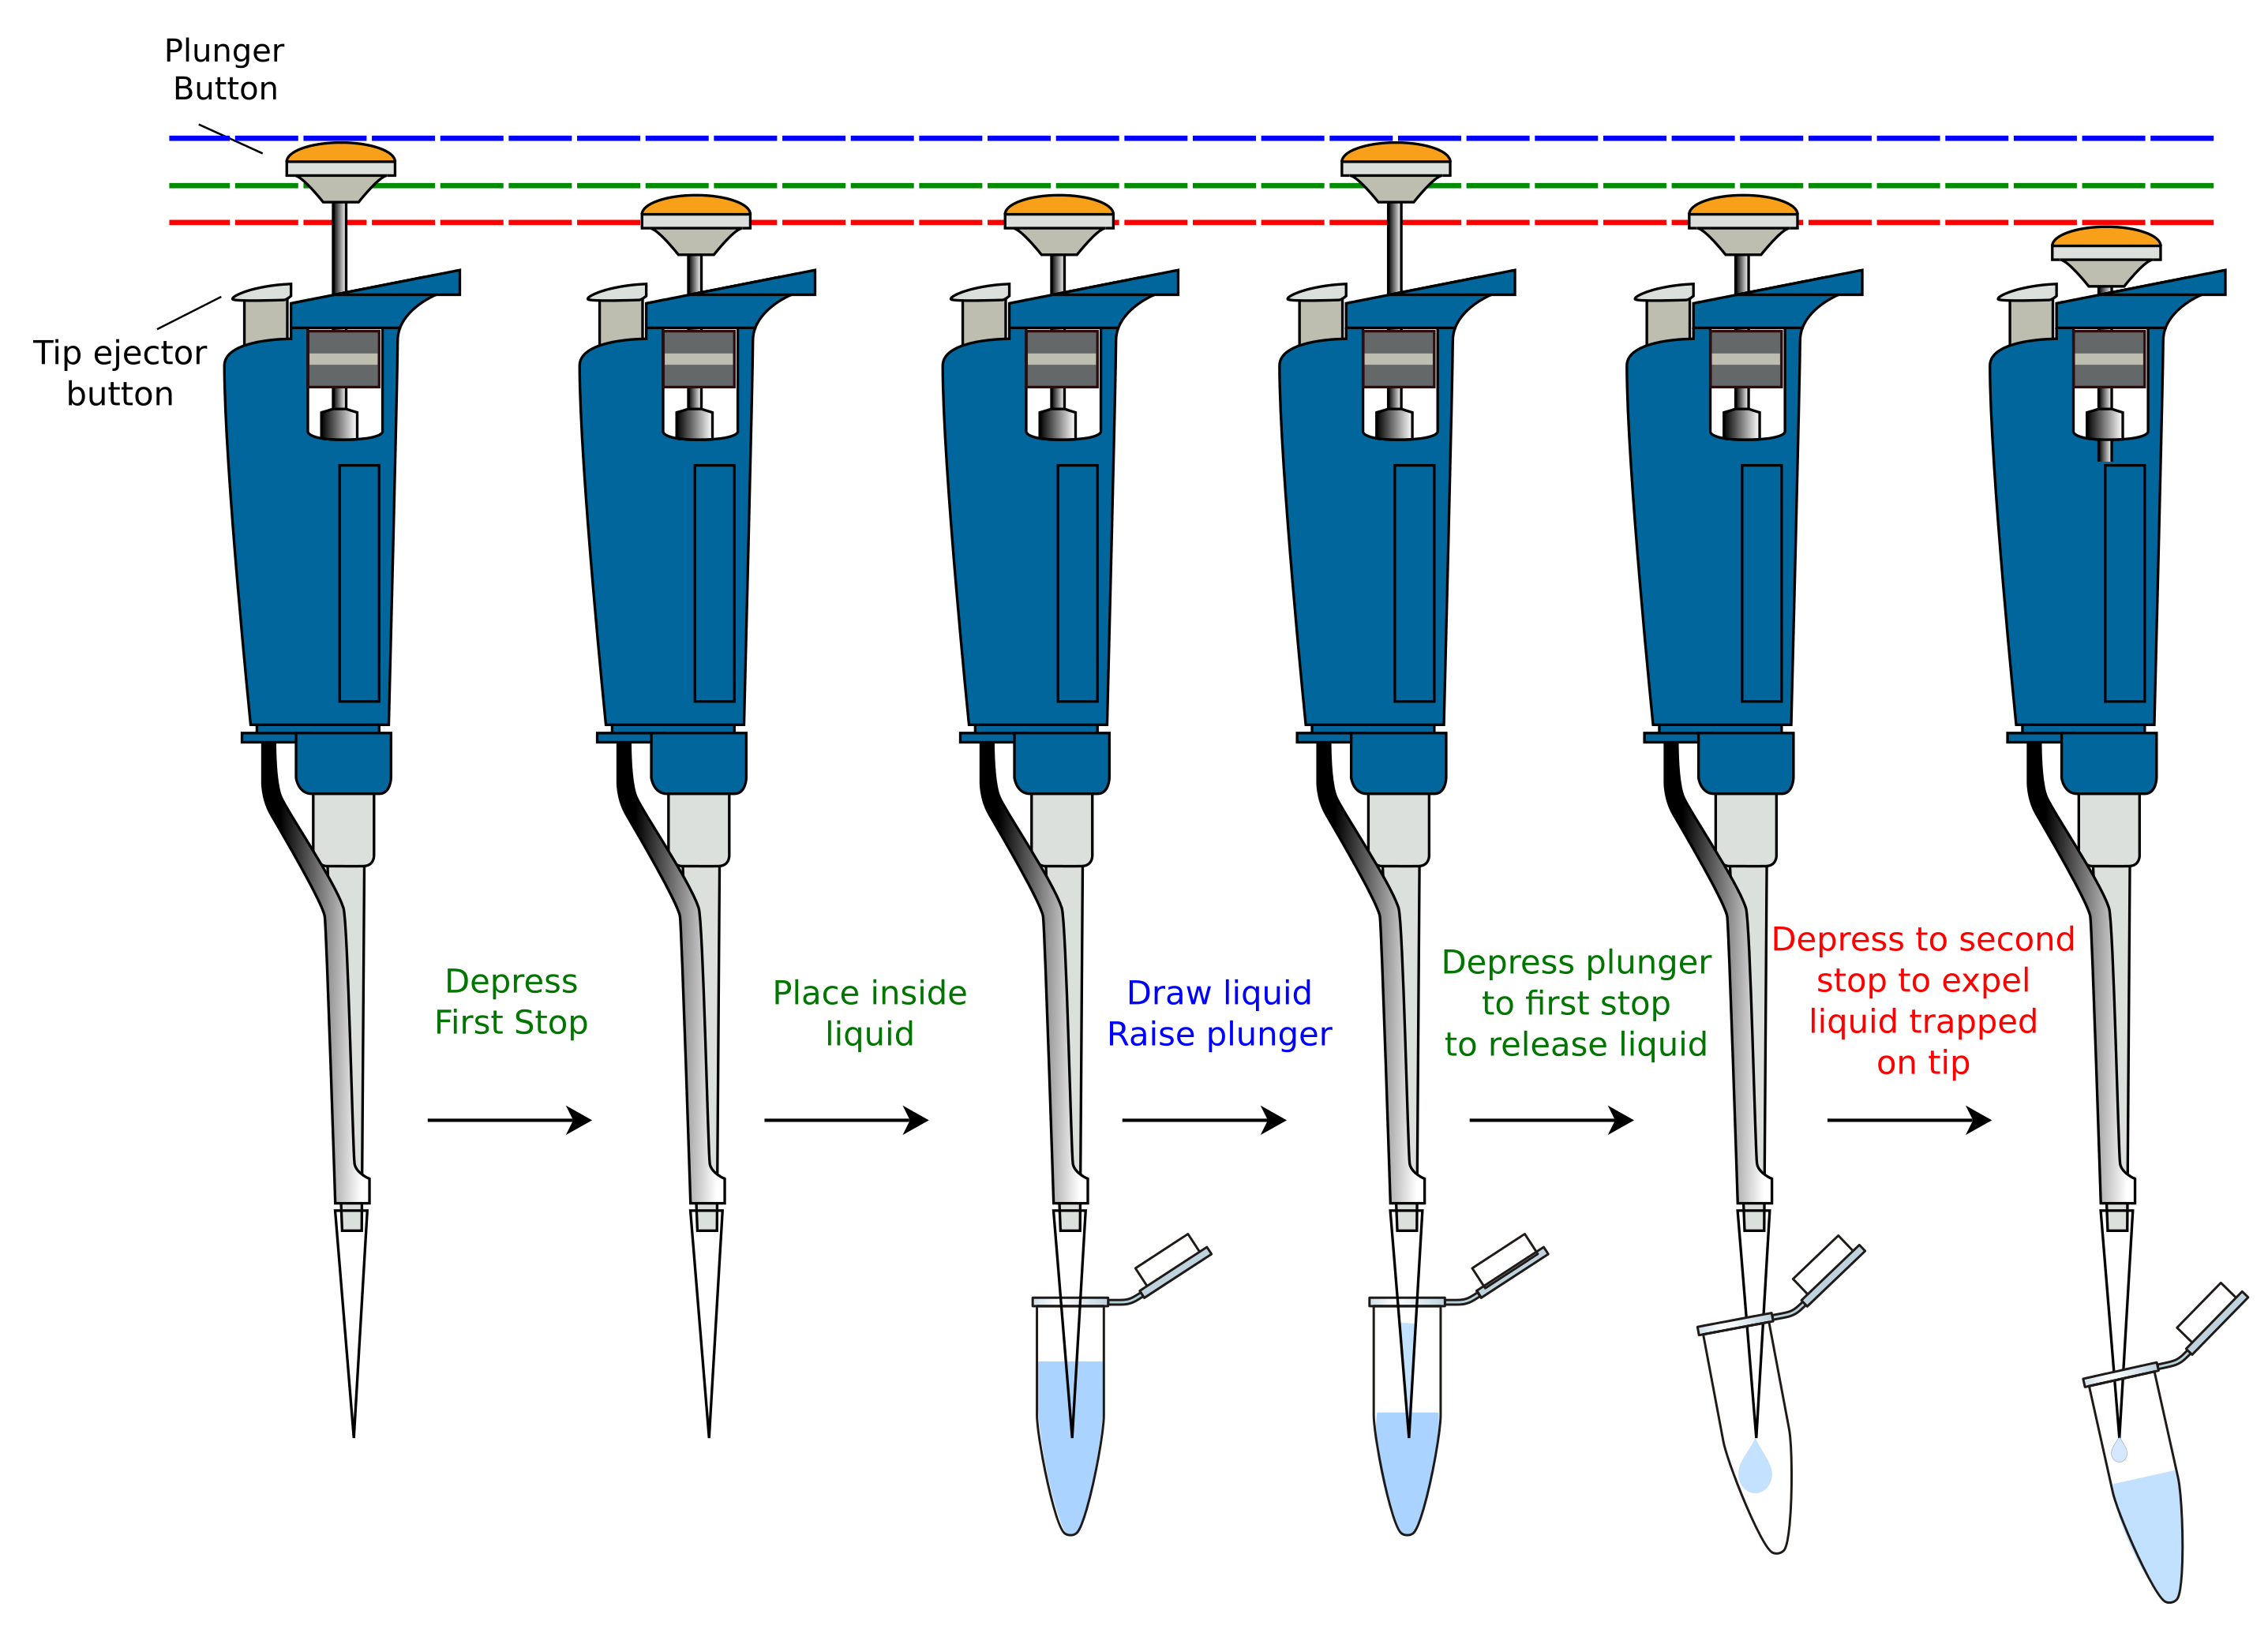
Pipetting sequence. Ensure the plunger is depressed outside of the liquid to displace air and avoid blowing bubbles into solution. Carefully draw the plunger up slowly and follow the liquid to avoid drawing air. Depress the plunger in destination tube to the first stop. Depress to the second stop if fluid remains in the tip to expel full volume.
Rules For Use of the Micropipettors
These are precision instruments which can easily be damaged. Treat them with respect and care. They are essential for your success in this course and shared amongst numerous students.
- Never measure higher or lower than the range of the pipettor allows.
- An exception to this rule is the P200 labeled 50-200 μl.
- While we have P100 pipettors for this range, they appear too similar to P20 that they are often confused.
- Originally, P200 were labeled 20-200 μl and we know that the lower range is less precise on these.
- Never turn the volume adjuster above or below this range indicated on the pipettor or you risk breaking the instrument.
- Never allow liquid to get into the micropipettor.
- This causes contamination.
- This weakens the seal on the o-rings and can damage them.
- Never use the micropipettor without a tip.
- Never invert or lay down the micropipettor with liquid in the tip.
- Liquids will roll into the piston this way.
- Never let the plunger snap back when filling or ejecting liquid.
- Never immerse the barrel in fluid.
- This causes contamination.
- Never set the micropipettor on the edge of the bench; this may result in the micropipettor falling or being knocked onto the floor.
Exercise: Pipetting Practice
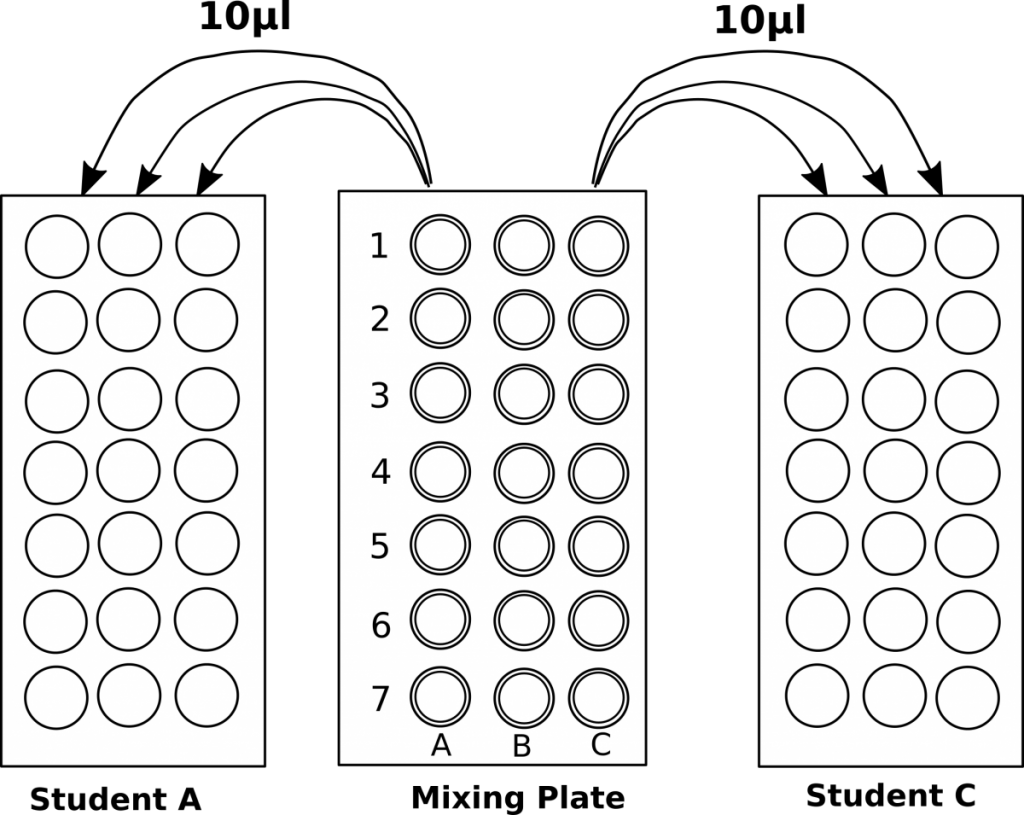
- Prepare seven dye mixtures as illustrated in the table below.
- One student mix samples in column A and a second mixes in column C.
- Column B is left empty and used if one student makes a mistake.
- Each dye mixture prepared in the first well to reach a total volume of 45 μl.
- Pipet 10 μl in triplicate from each well of the mixing plate into the center of the appropriate circles on the target card.


