
22.5: Laboratory Activities and Assignment
- Page ID
- 53848

Laboratory Activities and Assignment
Part 1: Review of the Reproductive Systems
1. Label the structures listed below on the diagram of the female genitalia below.
|
|
|
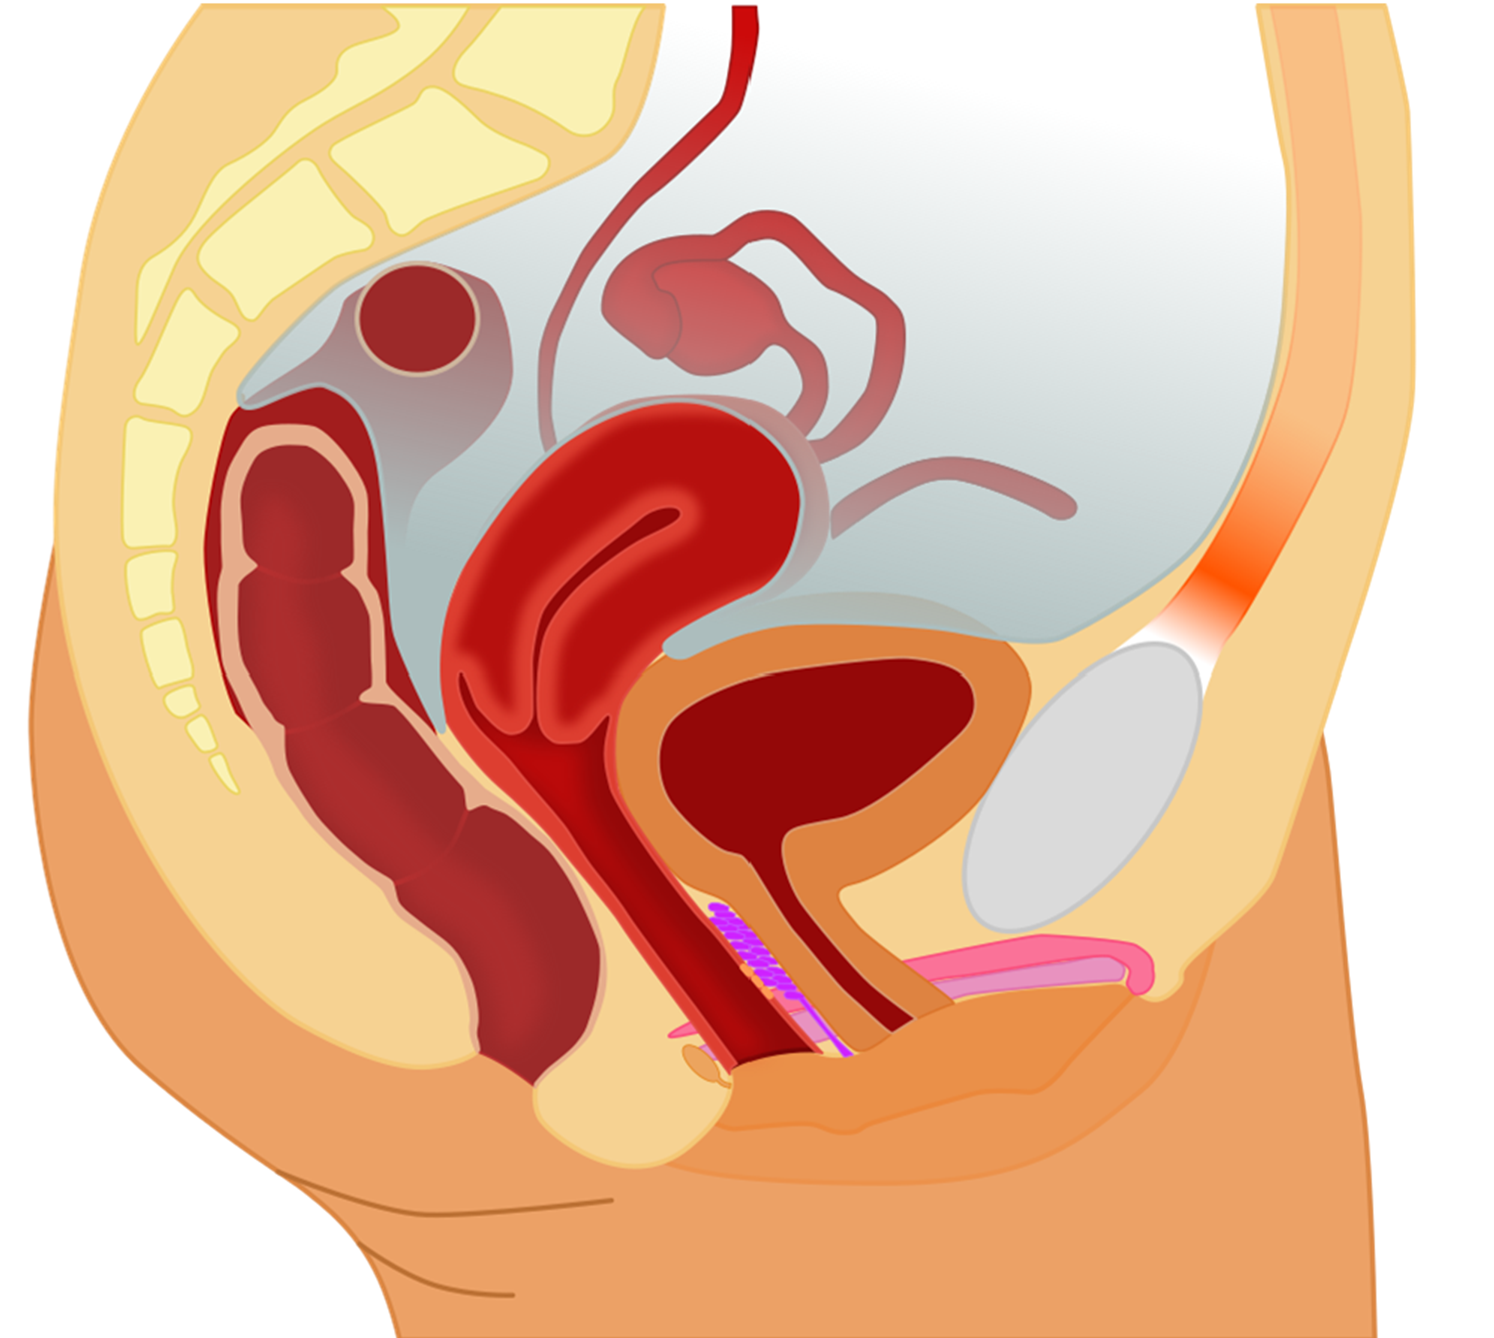
2. Label the structures listed below on the diagram of internal female genitalia below.
|
|
|

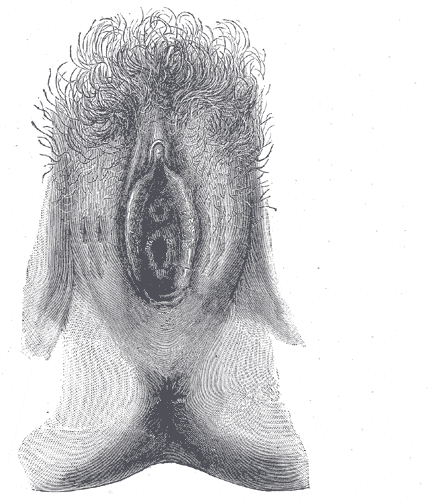
3. Label the structures listed below on the diagram of the external female genitalia.
|
|
|
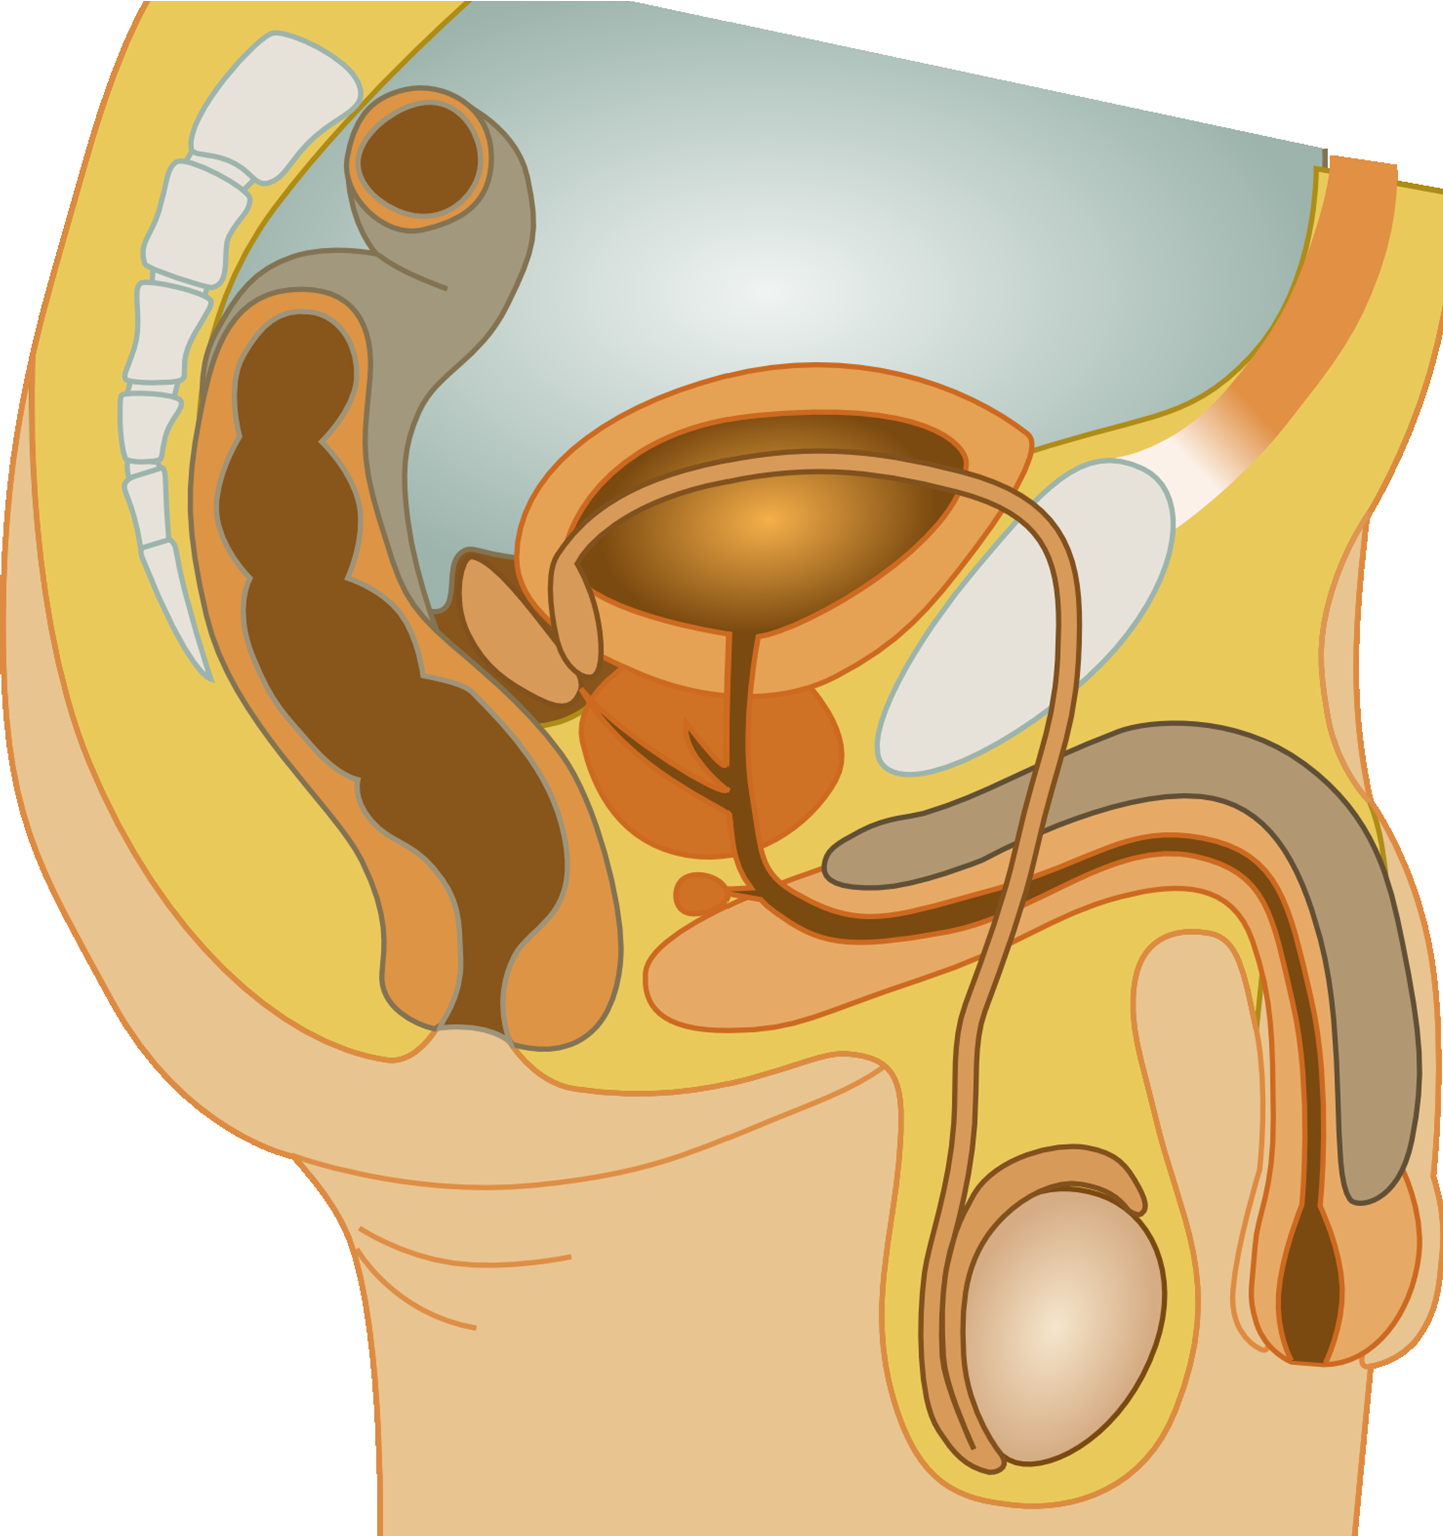
4. Label the structures listed below on the diagram of the male genitalia below.
|
|
|
5. Label the structures listed below on the diagram of the male genitalia below.
|
|
|
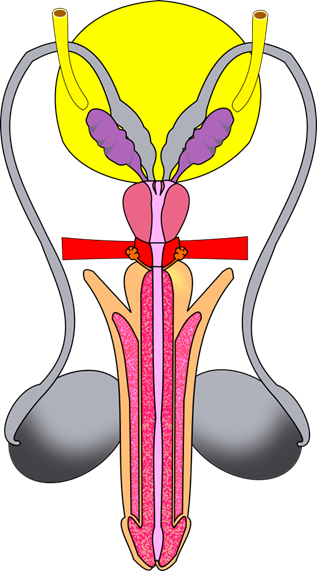
7. On the figure above, number the structures spermatozoa pass through to exit the male reproductive system from where spermatids are created (#1) to the point where they exit the body.
8. On the figure above, add a star (*) next to the name of each structure that contributes to semen.
9. Label the structures listed below on the diagram of the male genitalia below.
|
|
|

10.Match the structure listed in the table below with its corresponding description.
|
Name of Structure |
Description |
|---|---|
|
_____ vas deferens |
1. produce sperm and testosterone |
|
_____ areola |
2. small convoluted tubules and site of spermatogenesis |
|
_____ testes |
3. conduct sperm to the urethra during ejaculation |
|
_____ mammary gland |
4. produces an ovum, estrogen, and progesterone |
|
_____ fimbriae |
5. a gland in mammals that produces milk |
|
_____ corpus cavernosum and corpus spongiosum |
6. ducts that carry milk from the mammary glands to the nipple |
|
_____ labia major |
7. pigmented area around the nipple |
|
_____ seminiferous tubules |
8. the larger outer folds of the vulva surrounding the inner folds; contain adipose tissue and hair |
|
_____ ovaries |
9. erectile tissues that form the bulk of the penis |
|
_____ lactiferous ducts |
10. small fingerlike projections at the end of the fallopian tubes |
Part 2: Histology of the Reproductive Systems
- Obtain the slides listed below that are available for today’s lab.
- Focus on each sample and identify the structures listed for each type of tissue.
- Indicate the total magnification you make each illustration at in the space provided.
- Illustrate each tissue you observe with the microscope at the magnification you listed.
- Label each illustration with the structures listed for each.
Ovary
More than one illustration at more than one magnification will be required to illustrate and label all structures
Label the tissue with: serosa, medulla, cortex, tunica albuginea, follicles, primordial follicles, primary follicles, secondary follicles, antral spaces, primary oocytes, corpus luteum, atretic follicles

Testis
More than one illustration at different magnifications and possibly of different slides will be necessary to illustrate and label all structures listed.
Label the tissue with: testis, epididymis, vas deferens, tunica albuginea, tunica vaginalis, seminiferous tubules, lumen of seminiferous tubule, spermatogonia, primary spermatocyte, secondary spermatocyte, spermatid
Part 3: Reproductive Systems Laboratory Activities
Labeling Male Reproductive Anatomical Model(s)
- Use the anatomical model(s) provided to your group.
- As a group, identify the structures listed below.
- Write each of the following structures on masking tape or labeling tape (with correct spelling) and stick onto the model to label each structure.
|
|
|
4. When you are done, ask your instructor to verify the labeling is correct.
Instructor Signature Confirming Correct Labeling: ___________________
5. Take a photo of your anatomical model for future reference for studying.
Labeling Female Reproductive Anatomical Model(s)
- Use the anatomical model(s) provided to your group.
- As a group, identify the structures listed below.
- Write each of the following structures on masking tape or labeling tape (with correct spelling) and stick onto the model to label each structure.
|
|
|
4. When you are done, ask your instructor to verify the labeling is correct.
Instructor Signature Confirming Correct Labeling: ___________________
5. Take a photo of your anatomical model for future reference for studying.
Attributions
Part 1: Review of Reproductive Systems
- "Anatomy and Physiology Lab Homework" by Laird C Sheldahl is licensed under CC BY-SA 4.0
- "Female anatomy with g-spot-nb.svg" by Tsaitgaist is licensed under CC BY-SA 3.0
- "Gray's Anatomy plates" by Henry Vandyke Carte is in the Public Domain
- "Human Anatomy Lab Manual" by Malgosia Wilk-Blaszczak, Mavs Open Press, University of Texas at Arlington is licensed under CC BY 4.0
- "Male reproductive system.png" by User:Ningyou is licensed under CC BY-SA 3.0
- "Male reproductive tract.png" by Sheldahl is licensed under CC BY-SA 4.0
Part 2: Histology of the Reproductive Systems
- "BIOL 250 Human Anatomy Lab Manual SU 19" by Yancy Aquino, Skyline College is licensed under CC BY-NC-SA 4.0
Part 3: Reproductive Systems Laboratory Activities
- "Human Anatomy Lab Manual" by Malgosia Wilk-Blaszczak, Mavs Open Press, University of Texas at Arlington is licensed under CC BY 4.0