
1.2: Field Technique Tips for Measuring %Slope
- Page ID
- 20244

Slope is generally measured with an instrument called a clinometer. When sighting through a clinometer, the measuring line is placed on the target, and %slope is read from the scale. Both eyes are open, as one eye reads the scale, and the other eye sights on the target (Figure 1.7).
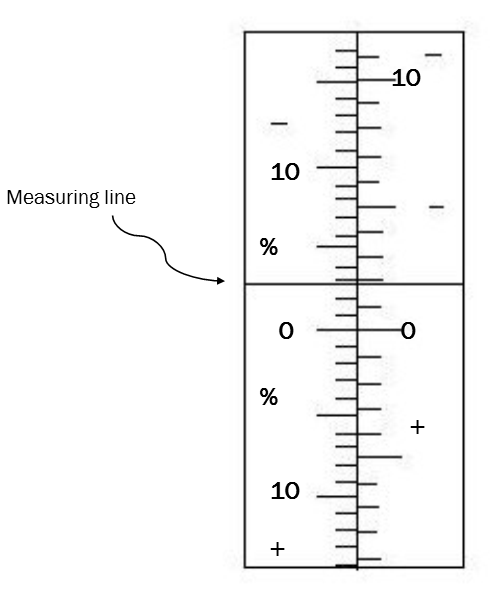
Figure 1.7. A clinometer generally has two scales. In this figure, the scale on the left is the %slope scale. The scale on the right is a topographic slope scale (see Chapter 2). Also note the “plus” signs below zero on each scale, and the “minus” signs above zero on each scale. In this illustration, the %slope reading is just under 3%. Since the reading is on the “minus” side of zero, the person using the clinometer is looking slightly downhill.
1. Measuring %slope for profiles is easiest to do with a partner. First determine where 0% slope (eye level) is on your partner. Then use this point as the target when taking readings with the clinometer (Figure 1.8). This way, you will be measuring parallel to the slope, mirroring the land.
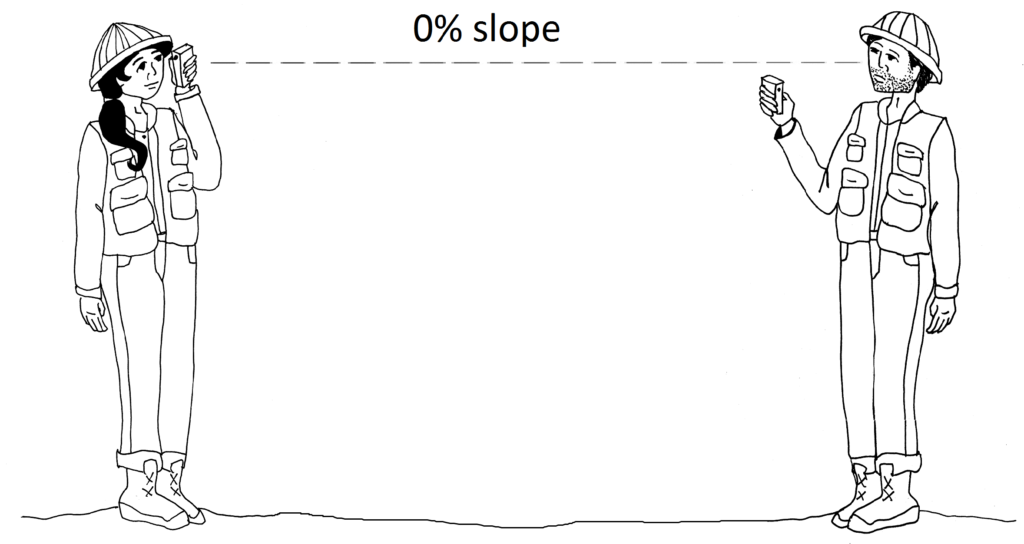
Figure 1.8. Standing on level ground close to each other, partners first determine where 0% slope is on the other person. In this example, the technician on the left will sight on her partner’s nose when taking %slope readings with the clinometer.
2. To determine %slope, one partner walks up or down the slope to a point where a reading should be taken, such as a major change in slope. A reading is taken and recorded to the nearest % (Figure 1.9).
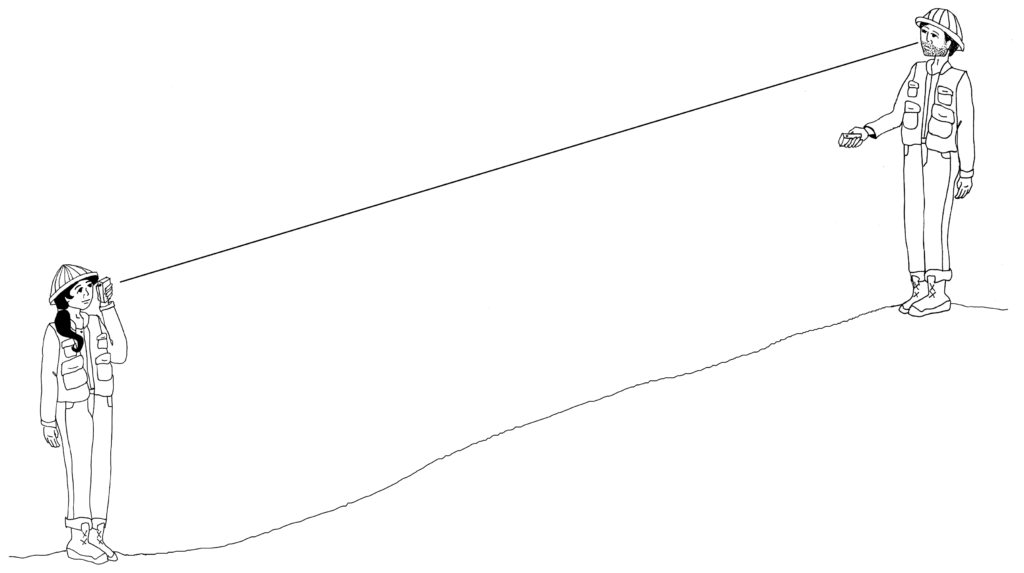
Figure 1.9. Sighting on a partner at eye level (as determined beforehand in Figure 1.8) allows a person to obtain an average %slope reading, paralleling the slope of the land.
3. When working where there is a lot of brush, it may be difficult to see your partner. A brightly colored target held at the sighting point, such as a painted piece of cardboard, can substitute for your partner. Your partner’s hard hat will work in a pinch as well.
4. When working individually on forested slopes, you will have to substitute a tree for your partner. Estimate eye level on a tree that you can see clearly, and take a reading on that point. When determining average slope on a long hillside, try to pick a point as far down or up the hill as possible, to even out the slight dips and bumps on the ground.